Home
» 🎮 Esports
»
How to Fix Fortnite Texture Pop-In on PC: 8 Checks That Actually Matter
How to Fix Fortnite Texture Pop-In on PC: 8 Checks That Actually Matter
Fix Fortnite Texture Pop-In: Start With These Checks
If the ground looks blurry when you land, walls sharpen only after you approach them, or buildings appear to gain detail a moment late, start by updating your graphics driver, verifying Fortnite in the Epic Games Launcher, and checking whether your PC has enough memory and fast storage. Then adjust the rendering mode and texture settings to match your hardware. There is no single setting that fixes every case of Fortnite texture pop-in on PC.
The order matters: broken or gray textures suggest a driver problem; delayed loading after fast movement suggests a resource or storage bottleneck; deliberately simplified surfaces in Performance Mode may be expected behavior rather than a bug. Epic Games specifically associates gray, noisy, or pixelated textures with possible graphics driver issues in its texture-loading support article.
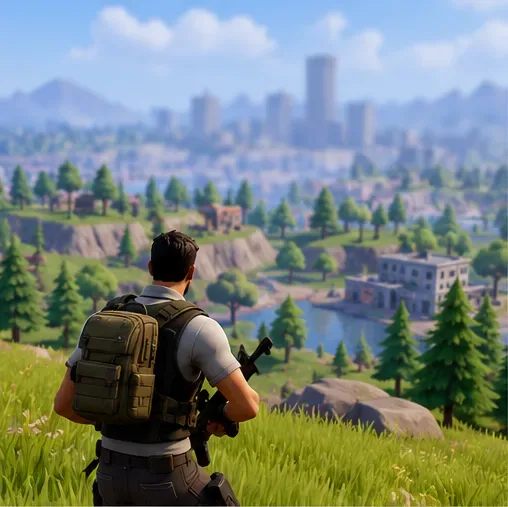
Distant landscape detail is the area to watch when comparing texture loading across identical gameplay routes.
1. Update the Graphics Driver and Windows
Best for: gray terrain, pixelated surfaces, unexpected texture corruption, or a problem that began after an update. Start here before downloading large optional texture files.
Press Windows + X and open Device Manager, then expand Display adapters to identify your GPU.
Download a current compatible driver directly from NVIDIA, AMD, or Intel. Prefer the graphics card or laptop manufacturer’s recommended package when it provides model-specific driver instructions.
Install the driver and restart Windows if requested.
Open Windows Settings > Windows Update and install applicable system updates, then relaunch Fortnite.
If you already have the latest driver and the issue began immediately after updating it, check the GPU vendor’s release notes or support instructions before attempting a rollback. Do not install random driver packages from third-party download sites.
Identify the actual graphics processor before choosing a driver package from its manufacturer.
2. Verify Fortnite Files in the Epic Games Launcher
Best for: missing assets, repeated visual glitches after an update, or a problem affecting one PC but not another. Verification checks the installed game data and repairs files when needed. It is safer than deleting random folders or reinstalling the entire game immediately.
Close Fortnite and launch the Epic Games Launcher.
Open Library and locate Fortnite.
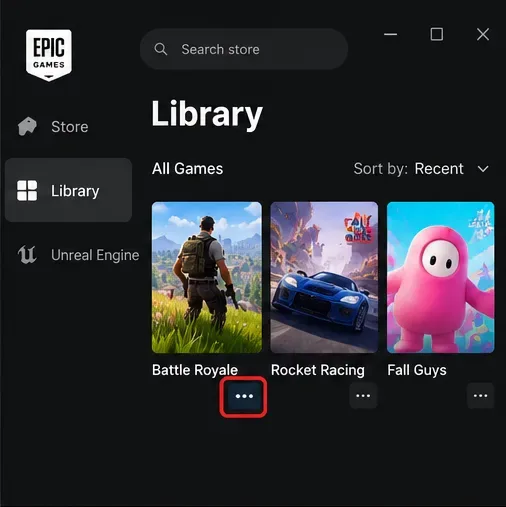
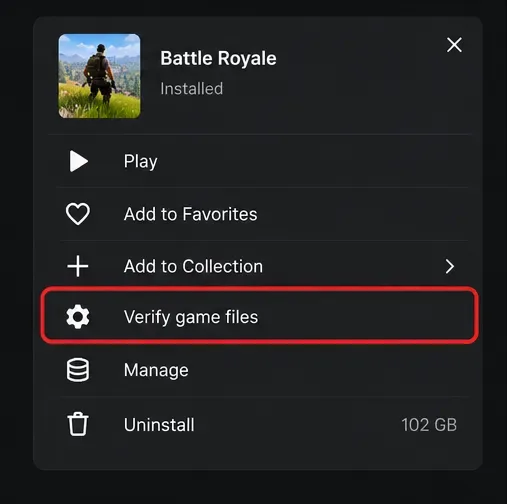
Click the three-dot menu beside Fortnite, choose Manage, and select Verify.
Let the verification finish and launch the game again.
Epic documents this exact Library > Manage > Verify route in its Fortnite performance troubleshooting guide. File verification cannot increase the available video memory, so continue to the hardware and graphics checks if the issue persists.
Find Fortnite in the Epic Games Launcher Library and open the game management controls.Run file verification to check for damaged or missing installation files before reinstalling.
3. Try DirectX 12 or Performance Mode Based on Your PC
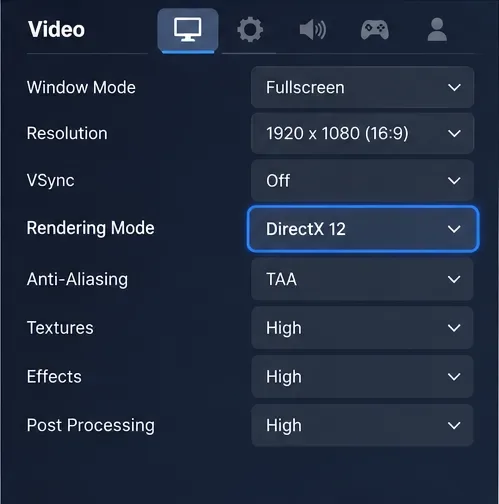
Best for: a visual-quality problem linked to the current rendering path. Epic supports selecting Rendering Mode under Fortnite’s Video settings and restarting the game to apply it. A rendering-mode change is a controlled test, not a guarantee that texture streaming will improve.
Launch Fortnite and open the player menu, then Settings.
Open the Video tab (monitor icon).
Find Rendering Mode in the Display section.
For a capable modern PC, test DirectX 12. Apply the change and restart Fortnite.
For older or entry-level hardware that struggles to maintain a playable frame rate, test Performance – Lower Graphical Fidelity instead, then restart.
Performance Mode is designed to prioritize smoothness over detail. If you choose it, simplified textures can be part of the quality trade-off. Epic’s Performance Mode instructions describe the intended FPS benefit and restart requirement. For DirectX 12 image-quality options, see Epic’s DirectX 12 and anti-aliasing guidance.
Check the current rendering mode, apply one change at a time, and restart the game.
4. Balance Texture Quality, Resolution, and Frame Rate
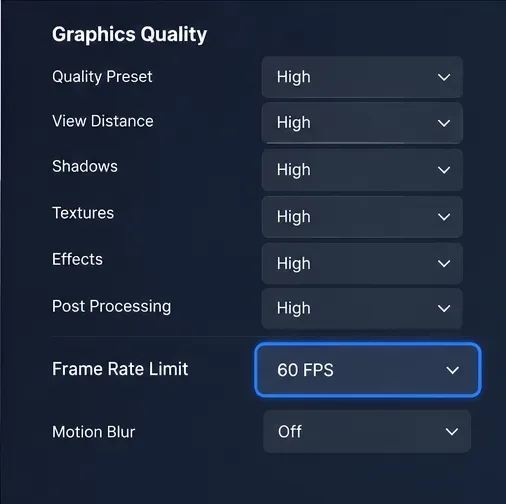
Best for: textures that sharpen slowly while the game also stutters or the frame rate swings sharply. In the Video menu, start with moderate quality settings and raise Textures only if your GPU has spare memory. Keep unrelated costly effects lower if you need more headroom.
Test a fixed Frame Rate Limit that your PC can sustain rather than running at Unlimited. Epic explicitly recommends lowering the frame-rate cap, for example from Unlimited to 60 FPS, when diagnosing low-quality textures in its low-quality graphics support page. Sixty FPS is an example diagnostic limit, not a mandatory optimal setting for every computer.
Separately, if surfaces look consistently fuzzy rather than appearing late, inspect 3D Resolution and upscaling choices. A low render resolution can make a fully loaded texture look blurry. Epic suggests testing 3D Resolution at 100% in its graphics troubleshooting guide. Raise settings gradually after confirming that loading is stable.
Compare texture quality and a sustainable FPS cap instead of maximizing every graphics option simultaneously.
5. Check the High-Resolution Textures Installation Option
Best for: players who want sharper materials on a PC with enough storage and GPU resources. High-Resolution Textures is an optional installation feature in the Epic Games Launcher, not an in-match switch that guarantees faster loading.
Close Fortnite.
In Epic Games Launcher, open Library, click Fortnite’s three dots, and choose Options.
Check High Resolution Textures if you prioritize detail and have available storage.
Apply the change, allow any required download to complete, and reopen Fortnite.
Epic confirms the installation steps in its high-resolution textures article. On a limited-storage machine or when using Performance Mode, leaving the optional pack unchecked may be more appropriate. Also note that Epic says the separate “Pre-download Streamed Assets” option is intentionally missing in its support notice; do not rely on an outdated tutorial that requires this option.
6. Check VRAM, RAM, and Storage Speed
Best for: detail that arrives late while sprinting, driving, dropping into dense areas, or moving the camera quickly. Video memory (VRAM) is the GPU memory used for assets such as textures. RAM holds other running data, and the storage device supplies files when needed. Bottlenecks in any of these components can contribute to delayed loading, although the visual symptom alone cannot identify which component is responsible.
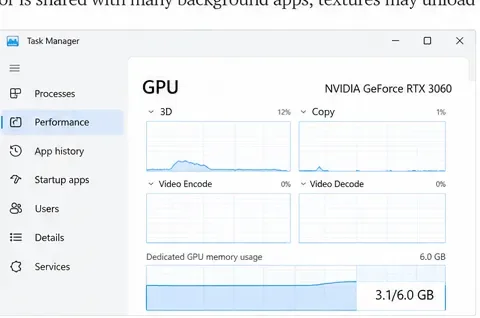
Open Windows Task Manager with Ctrl + Shift + Esc, choose Performance, then GPU. Watch dedicated GPU memory while you reproduce the problem. Check Memory usage as well. A high reading is a clue to investigate rather than proof of a specific defect.
Use Task Manager’s GPU pane to inspect dedicated video memory during texture-loading problems.
Epic currently lists 8 GB RAM as a minimum and 16 GB RAM as recommended, with an NVMe SSD in its recommended configuration. Its Epic quality specification lists an 8 GB VRAM class GPU or higher. Those are distinct tiers, not minimums for all rendering modes. Check the official PC requirements against your own PC.
If Fortnite is installed on a mechanical hard drive and you have room on an SSD, moving or reinstalling it onto the SSD is a reasonable troubleshooting step. It may reduce loading hitches, but Epic does not promise that an SSD will cure every instance of pop-in. Keep adequate free space for Windows and game updates.
7. Close Heavy Background Apps and Test Again
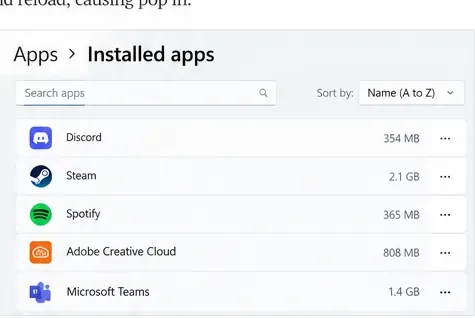
Best for: PCs with 8 GB RAM, integrated graphics, or background workloads competing for memory and disk access. Close unused browsers, video editing or recording projects, and other high-load software before launching the game. Do not terminate unfamiliar Windows services or security software just to chase a higher FPS counter.
Identify unnecessary applications that can be closed normally before starting a controlled Fortnite test.
Use the same repeatable route after each change: enter a match, travel toward a detailed area, turn the camera at roughly the same pace, and watch whether nearby surfaces remain blurry. This is a suggested self-check, not a published benchmark or a claim that any specific configuration has been tested here.
8. Handle DirectX 12 Stutter and Shader Cache Carefully
Best for: heavy repeated hitching specifically in DirectX 12, especially when combined with texture loading delays. Shaders are small GPU programs. Epic notes that a Fortnite client can repeatedly recompile DirectX shaders and cause significant stutter. Its DirectX 12 shader cache procedure explains a possible cache-clearing fix, with vendor-specific paths.
Only consider that procedure if you actually experience the matching DirectX 12 stutter symptom. Close Fortnite and the launcher first, read the complete official steps for your GPU, and understand that subsequent shader compilation can itself cause temporary hitches. Avoid third-party “optimizer” tools and broad folder-deletion advice.
Which Fix Should You Try First?
What you see
First action
When to change approach
Gray, noisy, or corrupted surfaces
Update or check GPU drivers
If unchanged, verify files and check Windows updates
Blurry terrain that sharpens when approached
Check RAM, VRAM, storage, and texture settings
If resources are fine, compare rendering modes
Intentionally simple-looking geometry
Check if Performance Mode is active
Use DirectX 12 if higher fidelity is the priority and hardware supports it
Consistently soft image, no visible loading delay
Review 3D Resolution and upscaling
Compare at 100% 3D Resolution if performance permits
Stuttering mostly in DirectX 12
Check graphics driver and shader cache guidance
Try another supported rendering mode if stutter persists
How to Tell Whether Texture Pop-In Is Fixed
After every meaningful change, restart Fortnite when required and compare gameplay in similar conditions. Look for textures reaching normal sharpness sooner, less delayed detail when turning the camera, and fewer simultaneous frame-time spikes. A single brief loading moment after a major update does not by itself prove a hardware failure.
If pop-in persists with current drivers, verified files, sensible quality settings, and enough system resources, collect your PC specifications, graphics driver version, current rendering mode, and a short description of exactly where the problem occurs before contacting Epic Games Player Support. That information helps distinguish an installation issue from a hardware limitation or game-specific regression without guessing at an unverified universal fix.