Home
» 🎮 Esports
»
Fix “A JNI Error Has Occurred” in Minecraft Java Edition: 4 Checks to Try
Fix “A JNI Error Has Occurred” in Minecraft Java Edition: 4 Checks to Try
Fix “A JNI Error Has Occurred” in Minecraft Java Edition: 4 Checks to Try
If Minecraft Java Edition stops at “A JNI error has occurred,” the banner is only a wrapper message—not a diagnosis. Read the exception immediately below it, then check the Java runtime selected for that specific game profile. The safest first fix is to restore the launcher’s bundled runtime; install a separate Java build only when you launch a server, installer, or third-party setup that needs one.
This guide explains what the common trace messages mean and walks through a careful Minecraft JNI error fix for the official launcher, modded profiles, and server jars.
What the JNI error message actually means
JNI is Java’s interface for calling native code. Java prints “A JNI error has occurred” when startup fails, but that line alone does not prove the JNI interface itself is broken. The useful clue is usually the exception name and first few lines that follow.
Trace clue
What it often points to
First check
UnsupportedClassVersionError
The selected runtime may be older than the Java bytecode requires. A mod or loader built for a newer Java target can cause the same clue.
Match the runtime to the Minecraft release, then test without mods.
NoClassDefFoundError or ClassNotFoundException
A required class or library is missing, incompatible, or not on the launch classpath.
Use a clean launcher installation and verify that the loader and mods match the game version.
UnsatisfiedLinkError
A native library could not load. A custom runtime, wrong system architecture, or damaged game files may be involved.
Restore the default runtime and repair the specific installation before changing system settings.
An exit code such as -1 does not identify the cause by itself. Keep the full error window or log so you can see the exception beneath the headline.
Four checks to fix a Minecraft Java JNI error
1. Save your worlds and read the first exception
Before removing files or rebuilding a profile, close Minecraft and copy your saves folder somewhere safe if you plan to touch the game directory. Do not delete the entire .minecraft folder as a first step: it can contain worlds, screenshots, resource packs, and settings.
Copy the first exception name and several lines beneath it. The launcher’s latest.log can provide more context when the error window is brief. This small check helps distinguish a Java-version mismatch from a missing library or a mod that fails during startup.
2. Restore the launcher’s bundled Java runtime
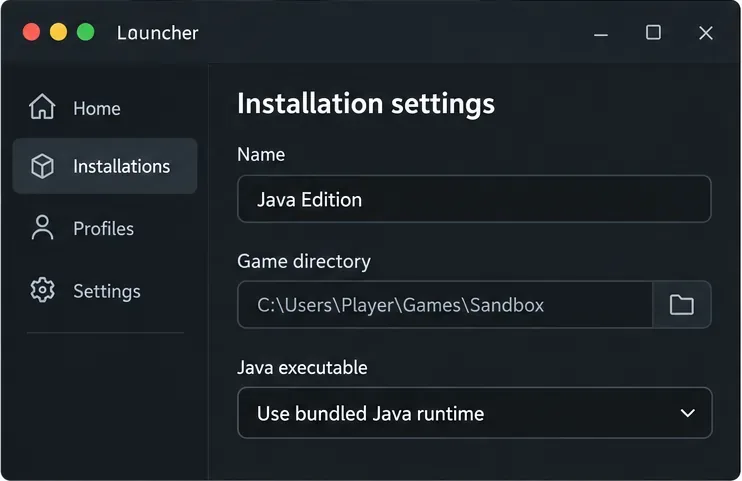
The official Minecraft Launcher supplies its own Java runtime for game installations. A Java version printed by your computer’s terminal may therefore differ from the Java that the launcher actually uses. In the launcher, open Minecraft: Java Edition, choose Installations, edit the affected profile, and open More Options. If the Java Executable field points to a manually installed java.exe or javaw.exe, clear the custom path or select the launcher-managed default. Restore default JVM arguments too if you changed them. Save and try the same profile again.
The installation settings illustration shows the bundled runtime selected for a game profile.
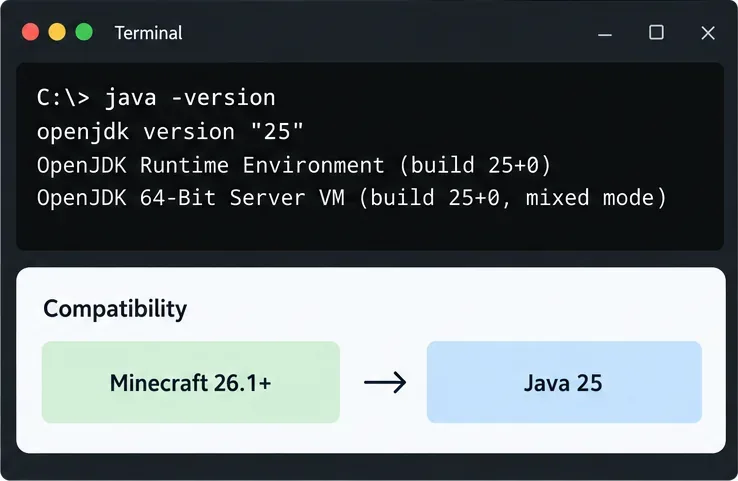
Java requirements changed over time, so “use Java 21 for every recent version” is no longer accurate. Mojang’s release notes say Minecraft 1.20.5 requires Java 21, while Minecraft 26.1 moved to Java 25. If you play 26.1 or later, use Java 25 when a manual runtime is necessary; for older releases, follow that release’s requirement or let the official launcher manage Java. See the Minecraft 26.1 technical notes and the Minecraft 1.20.5 release notes.
Minecraft release
Java requirement to check
26.1 and later
Java 25
1.20.5 through the 1.21 series
Java 21
Older releases
Requirements vary; use the launcher default or check that version’s release notes.
If you launch a server .jar or a Java-based installer directly, check the Java visible to that process with java -version. On Windows, open Command Prompt; on macOS or Linux, use Terminal. If the command is missing or reports a version below the one required by your Minecraft release, install a compatible 64-bit OpenJDK build from Eclipse Temurin or follow the Fabric Java installation guide. The Fabric guide also notes that the Minecraft Launcher has its own Java installation; a system-wide Java change may not affect it.
Use java -version to inspect the runtime used by a direct Java command; it does not confirm which runtime a launcher profile selected.
3. Test a clean vanilla installation
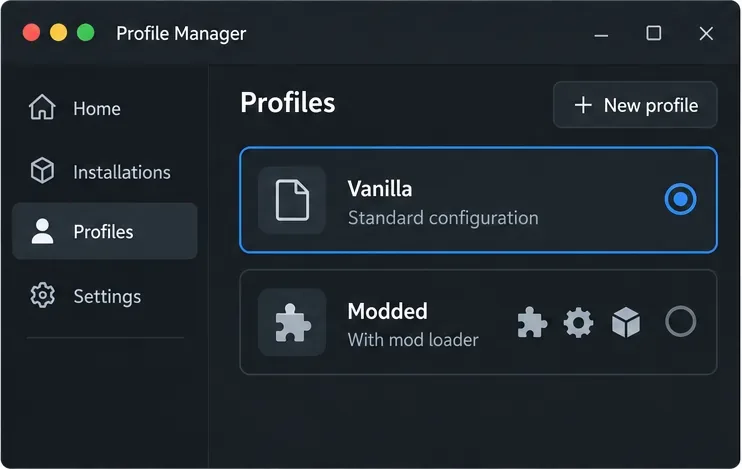
Create a fresh installation in the Minecraft Launcher using the same game version, but leave custom Java paths and JVM arguments at their defaults. Launch it without a mod loader. This separates a problem in the profile from a broader launcher or runtime problem.
Minecraft Help recommends creating a new Java installation to troubleshoot launcher crashes. If the fresh profile opens, compare its settings with the failing profile and reintroduce custom options one at a time. If it still fails, reinstall or repair the launcher from the official Minecraft download page, keeping your backed-up worlds and any custom files you need.
Keep a vanilla profile separate from the modded profile so you can tell whether the error follows the game or the add-ons.
4. Isolate mods, launchers, or a server jar
If vanilla starts but a modded profile does not, confirm that the loader, each mod, and the Minecraft version are intended to work together. Temporarily test a clean instance or disable the recently added or updated mods; do not replace every mod at once, because that hides the incompatible file. For a third-party launcher, inspect the Java setting for the affected instance rather than changing the runtime for every game.
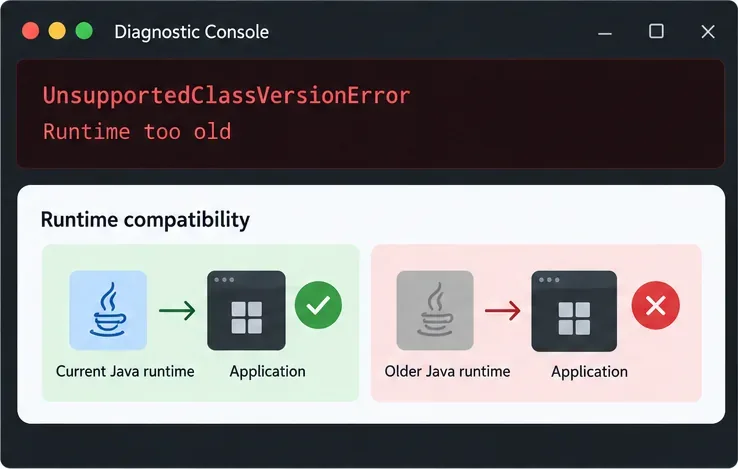
For a dedicated server or installer launched with a command, confirm which Java executable the command invokes. A UnsupportedClassVersionError means the program or one of its dependencies needs a newer Java runtime than the one currently running it; it can also point to a mod or loader compiled for an incompatible target. Update the relevant component or select the required runtime for that particular command. Avoid editing Windows PATH or JAVA_HOME globally unless you have confirmed that the command is resolving the wrong Java installation.
UnsupportedClassVersionError is a useful clue to check runtime compatibility before changing memory or graphics settings.
Fixes that usually waste time
Adding more RAM: memory allocation problems can cause crashes, but changing -Xmx does not repair an incompatible Java runtime. Use Minecraft’s memory guidance only when the log or available system memory points to allocation trouble.
Deleting the whole game folder: this risks saved worlds and personal files. Back up first and test a new installation profile before removing anything.
Disabling antivirus or running as administrator: these are not general JNI fixes. If the trace specifically shows a native library being blocked or missing, check the security product’s quarantine and restore only files from a trusted official installation.
How to confirm the fix
Launch the exact profile that failed. If the main menu opens, test a temporary world before returning to an important save. Then test the modded profile separately. If the same vanilla profile still fails, record your operating system, Minecraft version, launcher type, Java version used by the failing process, and the full exception. Use Minecraft’s launcher troubleshooting instructions for a launcher crash, or report a reproducible game issue through the Mojang bug tracker.
The key to fixing “A JNI error has occurred” in Minecraft Java Edition is to identify the underlying exception, then match the Java runtime and game profile. Resetting a custom Java path and testing a clean vanilla profile resolve the most useful checks without risking your worlds or changing unrelated system settings.