How to Check Real-Time Server Latency in the PUBG HUD
Enable PUBG’s network statistics HUD to monitor ping and packet loss in a match. See where to find it, what the numbers mean, and what they cannot diagnose.
To enable Performance Mode with Low Meshes in Fortnite on PC, open Settings, select the Video tab, change Rendering Mode to Performance, apply the change, and restart the game. Then return to Video settings, find Meshes under Graphics Quality, set it to Low, and apply again. Changing Textures to Low alone does not enable Low Meshes.
This combination is a practical starting point when smooth gameplay matters more than detailed scenery. It is also a tradeoff: simpler objects may suit your performance target, while higher mesh detail may be easier for you to interpret. Choose using repeatable comparisons on your own PC rather than assuming someone else's settings will produce the same results.
Checked October 7, 2026: Epic's April 30, 2026 PC settings guide identifies the current Performance renderer as DirectX 12 based and recommends Meshes set to Low for competitive performance. Older instructions that equate Performance exclusively with DirectX 11 should not guide your setup. See Epic's 2026 PC settings guide.
A rendering mode is the graphics path the game uses to draw each frame. Performance reduces graphical features to lower rendering demands. A mesh is the geometry that gives a 3D object its shape; lowering mesh quality reduces object detail. A texture supplies surface detail, while 3D Resolution controls the resolution used to render the 3D scene. These settings address different parts of the image.
Frames per second, or FPS, measures how many frames are displayed each second. A higher number can make motion feel smoother, but a brief peak does not tell you how well the game behaves during a crowded fight. Evaluate both the FPS counter and interruptions you notice when moving, aiming, and building.
| Choice | Main reason to try it | Tradeoff to check |
|---|---|---|
| Performance with Low Meshes | Prioritize reduced object detail and a lighter graphics configuration. | Decide whether simplified scenery and structures remain comfortable to read. |
| Performance with High Meshes | Compare more detailed geometry while keeping the Performance renderer. | Check whether the added detail costs enough smoothness to matter on your PC. |
| Standard DirectX 12 | Explore a broader visual configuration when image quality is a priority. | Compare actual gameplay stability rather than assuming a particular renderer is fastest. |
These are selection criteria, not benchmark results. No FPS gain, latency reduction, or exact appearance is guaranteed here. This guide has not measured the current build on your hardware.
Use the installed Windows PC version for this procedure. Do not expect console graphics menus to expose the same renderer and Meshes controls. Before changing anything, record your current rendering mode, resolution, frame limit, and quality settings so you can restore a familiar configuration. The settings illustrations below focus on the relevant controls; menu placement and available rows can vary with updates and hardware.
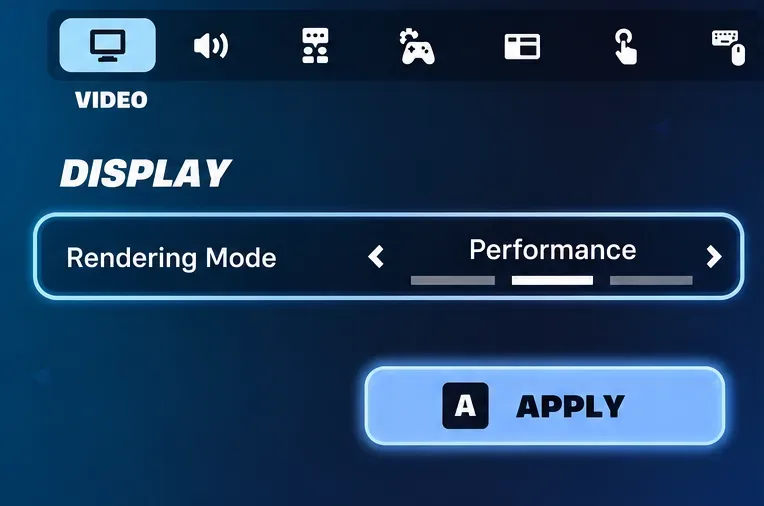
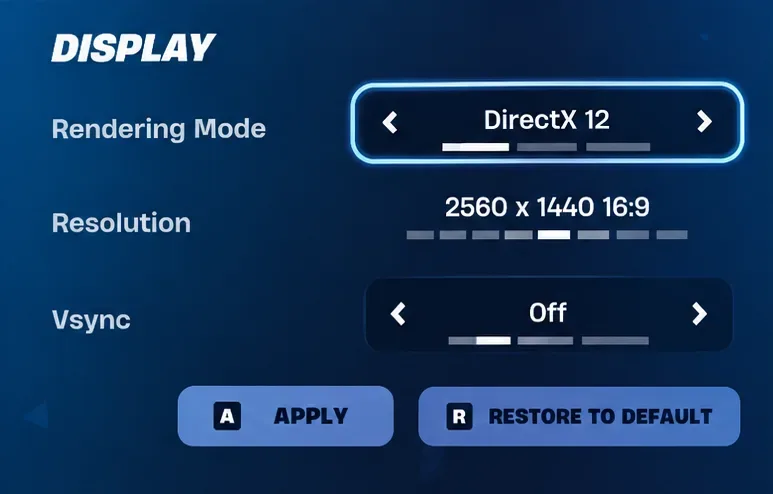
Launch Fortnite and open the player menu. Choose the Settings gear, then the Video tab, identified by a monitor icon. You can also open the menu with Esc on PC. Find the Display section before adjusting graphics quality. Keep your current screen resolution for the first comparison so that a resolution change does not obscure the effect of the renderer.
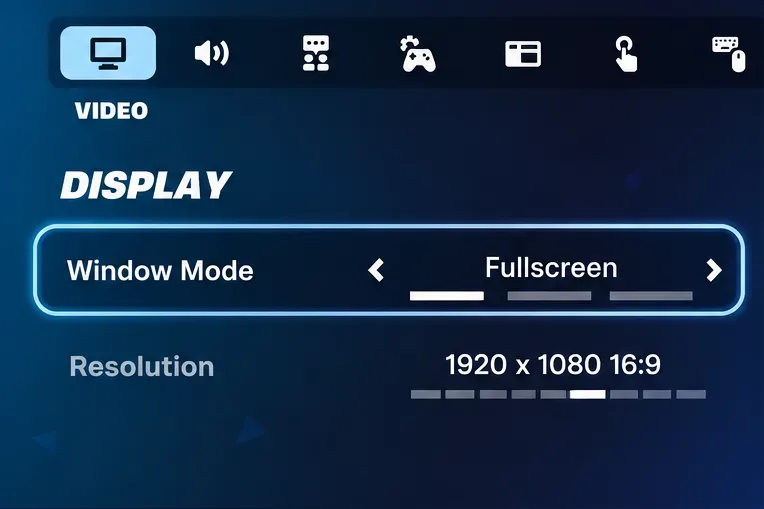
Use the arrows beside Rendering Mode until Performance appears. Some Epic support text also calls this Performance - Lower Graphical Fidelity. Select Apply to save the change. Epic documents this route in Epic's Performance Mode instructions.
Do not assume setting every visible quality option to Low in standard DirectX 12 is equivalent. The renderer selection is a separate control. Leave your frame limit unchanged while switching so the initial comparison remains useful.
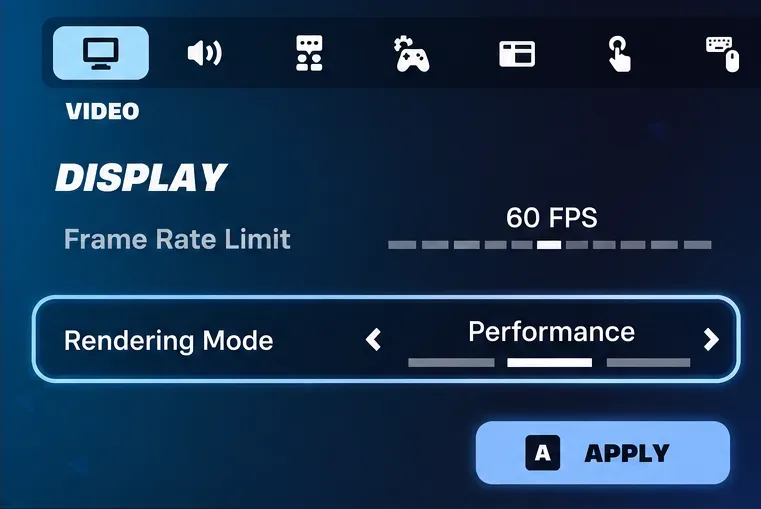
Close and relaunch Fortnite after applying the rendering change. Once the game is back, reopen Video settings and verify that Rendering Mode still reads Performance. A saved selection and a completed restart are better confirmation than the look of a single lobby screen.
If the mode has reverted, resolve that problem before trying to tune Meshes. Repeatedly adjusting quality settings under a different active renderer will not produce a meaningful comparison.
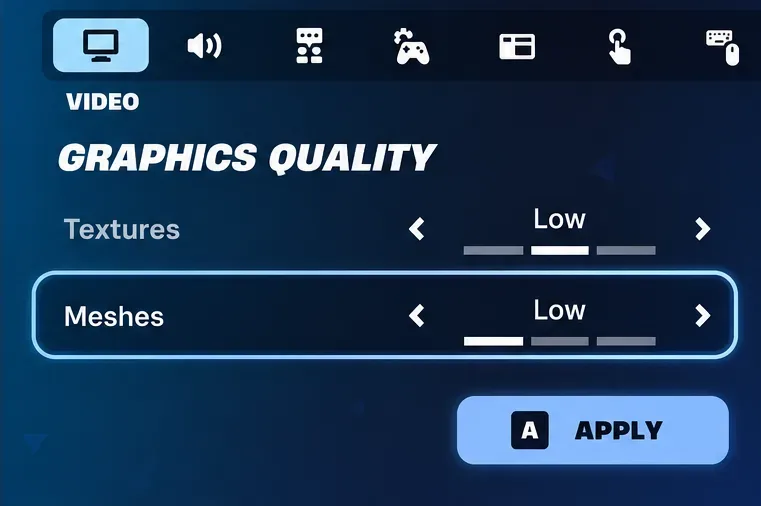
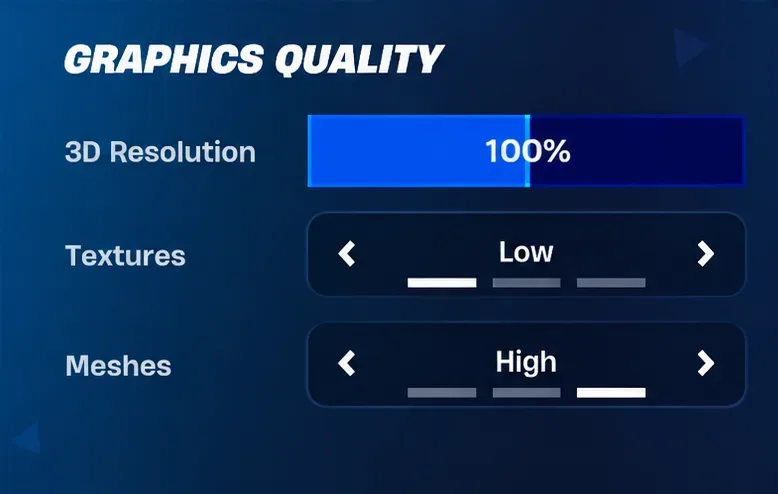
Scroll to Graphics Quality, find Meshes, select Low, and choose Apply. Reopen the settings to confirm the saved value. This is the specific control needed for Low Meshes; the Textures row above it serves a different purpose.
If Meshes is missing, first confirm the Performance selection after the restart. Look farther down the Video menu rather than relying on the location shown in an old video. If the option remains absent, avoid guessed configuration values: document the current platform and menu state when asking Epic for support.
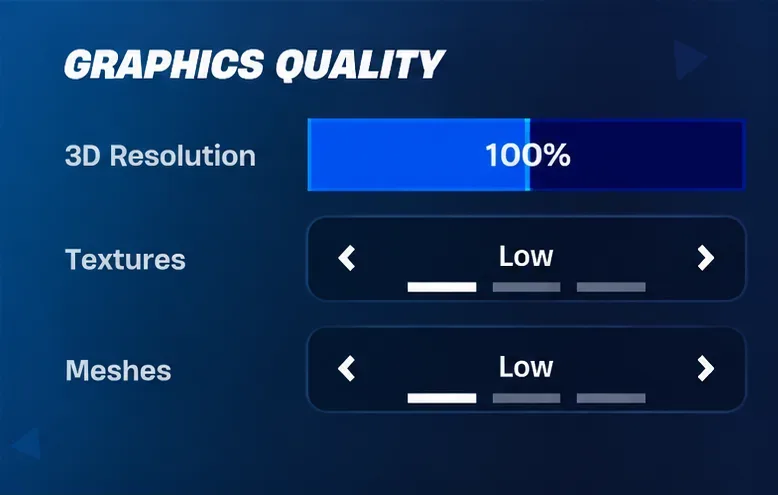
Keep 3D Resolution at 100% initially if performance permits, and use Low Textures as a conservative baseline. Those are starting values, not requirements for activating Low Meshes. If you later lower 3D Resolution, inspect distant objects and outlines carefully; gaining speed is less useful if the scene becomes difficult for you to read.
Adjust one setting at a time. For example, compare two resolution values only after deciding whether Low Meshes meets your needs. Otherwise, you will not know which change affected the result.
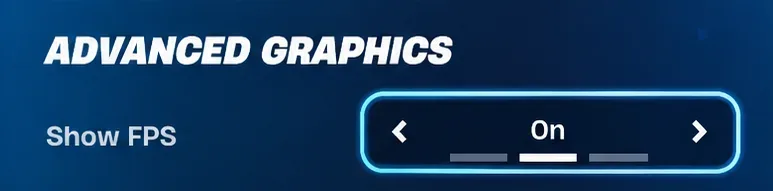
Find Show FPS under Advanced Graphics, turn it on, and apply. Use a familiar Creative route for a repeatable check, then try the mode you actually play. A quiet lobby and an active match place different demands on your system.
Keep the map, route, resolution, and frame limit as consistent as possible. Repeat the route, note where the counter drops, and record whether camera movement feels interrupted. Do not turn one unusually smooth run into a claim that the setting always fixes stutter.
This comparison is optional. Keep Performance active, change only Meshes to High, apply, and repeat your route. Examine the structures and environmental shapes you use when navigating or fighting. If High looks clearer to you and remains smooth enough for your target, it can be the better personal choice.
For Build players, include editing and moving around builds in the comparison. For Zero Build players, emphasize terrain and cover. These testing priorities reflect the tasks you perform; they do not establish a universal competitive advantage for either mesh setting.
If you want a different visual balance, record your Performance settings, select standard DirectX 12, apply, and restart. Recheck its quality options before testing because the available controls can differ. Use comparable resolution and frame-limit settings and run the same gameplay route.
Keep standard DirectX 12 if you prefer its image and it meets your smoothness target. Return to Performance and Low Meshes if reduced detail makes the game more comfortable on your system. Neither choice needs to become permanent.
Epic's rendering-mode save troubleshooting page provides a launcher override for a renderer that reverts. In the Epic Games Launcher settings, expand Fortnite, enable Additional Command Line Arguments, and clear existing arguments before entering -d3d12 -FeatureLevelEs31 for Performance. Record any existing arguments first so you understand what you are replacing. Relaunch and verify the renderer.
That command selects the rendering mode; it does not independently set Meshes to Low. Use the in-game Meshes control afterward. Avoid combining conflicting renderer commands or copying old DirectX 11 Performance arguments into a current setup.
Epic's low-FPS troubleshooting guide also identifies a read-only configuration file as a possible reason the mode cannot be changed. With Fortnite closed, check %localappdata%\FortniteGame\Saved\Config\WindowsClient\GameUserSettings.ini. Open the file's Properties and clear Read-only if it is enabled, then apply your settings normally. You do not need to edit undocumented values or delete the entire configuration folder.
Removing the optional high-resolution texture download is a storage decision, separate from enabling Low Meshes. Epic documents Library > Fortnite's three-dot menu > Options in the Epic Games Launcher. Uncheck High Resolution Textures and apply if you do not need that package.
Keep it if you regularly switch to a configuration that benefits from higher-resolution textures. Remove it if storage is tight and you intend to use lower texture settings. The package size can change with updates, so use the launcher's current information rather than an old fixed installation-size claim. Do not treat removing it as a guaranteed FPS improvement.
For the last situation, Epic's low-FPS troubleshooting covers game-file verification, graphics drivers, background programs, and cooling. Low Meshes changes rendering detail; it does not repair corrupted files, correct a network problem, or remove every hardware limitation. A successful setup is one that stays saved, remains readable, and behaves consistently in the matches you play.
Enable PUBG’s network statistics HUD to monitor ping and packet loss in a match. See where to find it, what the numbers mean, and what they cannot diagnose.
Learn how to import VALORANT crosshair codes, compare presets with manual settings and spectator copy, and fix common import issues.
Choose Dota 2 minimap size, hero icons, team colors, and background settings by readability, fewer misclicks, and clear results on your own display.
Fix Fortnite texture pop-in on PC with official steps for GPU drivers, file verification, DirectX 12, high-resolution textures, VRAM, SSDs, and stutter.
Learn what Heroes of the Storm minimap size and position options are verified, improve readability, and choose camera-click controls that suit you.
Set Super Smash Bros. Ultimate Quickplay to prefer hazards-off stages. Follow the Preferred Rules menu steps and learn why matchmaking may not always honor them.
Enable Server Latency and Packet Loss in Warzone to monitor connection quality, read the overlay, and use recurring spikes to guide troubleshooting.
Learn how to carry from mid lane in League of Legends by setting up waves, choosing safe roam windows, reading side lanes, and converting pressure into objectives.
Fix Minecraft Evoker spell problems with a safe vanilla test, version checks, log review, and a step-by-step way to isolate mod or datapack conflicts.
Fix PUBG stuck on Initializing on Steam with a focused checklist for PC service notices, launch options, game files, downloads, and connection issues.