How to Check Real-Time Server Latency in the PUBG HUD
Enable PUBG’s network statistics HUD to monitor ping and packet loss in a match. See where to find it, what the numbers mean, and what they cannot diagnose.
If fast camera movement in Marvel Rivals leaves the picture smeared, or the edges of the scene look soft while the center stays sharp, turn off Motion Blur and Depth of Field in the PC game’s Graphics options. Open Settings from the main lobby, select Graphics, switch both effects off, and verify the change in a low-pressure Practice session. This improves visual clarity for many players, but it does not fix frame drops, network lag, or every blur effect used by character abilities.
Update check: October 7, 2026. The official October 1 patch notes do not announce a change to these graphics controls. They list other fixes and event updates, so there is no verified new setting change to lead with. This guide focuses on the stable in-game options and explains how to check whether your result is actually clearer.
Motion Blur adds streaking or softness when the camera or objects move quickly. Turning it off can make a rotating view and moving targets easier to read, though some players prefer the smoother, cinematic look with the effect enabled. Depth of Field, often shortened to DoF, selectively softens parts of the image that are away from the focus point. Disabling it generally keeps more of the scene visually sharp.
These controls affect presentation. Switching them off does not guarantee a higher frame rate or lower input latency, and it will not remove blur caused by low resolution, temporal anti-aliasing, upscaling, a display response issue, or a brief frame-rate dip. Keeping that distinction in mind helps you choose the next step if the image still looks soft.
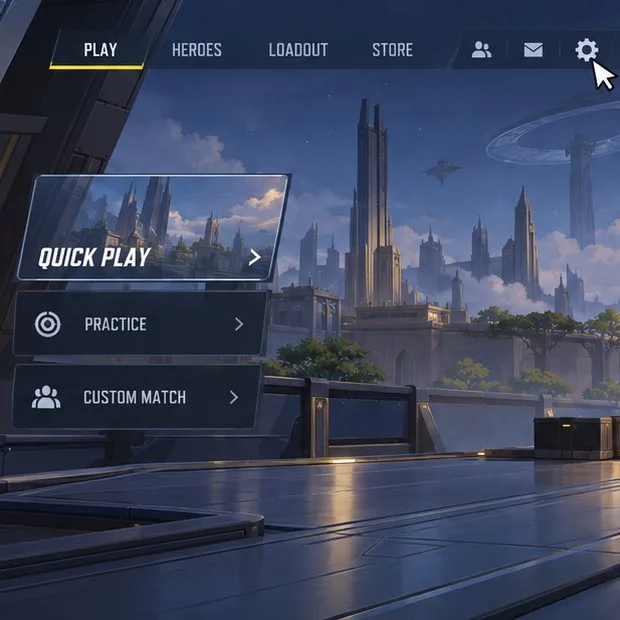
Wait until you are back at the Marvel Rivals lobby rather than changing graphics in the middle of a match. Select the gear-shaped Settings button in the upper-right area. The official FAQ also documents the settings button in the lobby interface. If you are using a controller, move focus to the same on-screen control and select it with the confirm button.
In the Settings panel, choose Graphics. This is the page for visual effects and display-related quality options. Menu layouts can differ between PC and console, so the screenshots here illustrate the PC-style route. If the category list is collapsed or scrolled, move through it until Graphics is visible rather than changing unrelated controls.
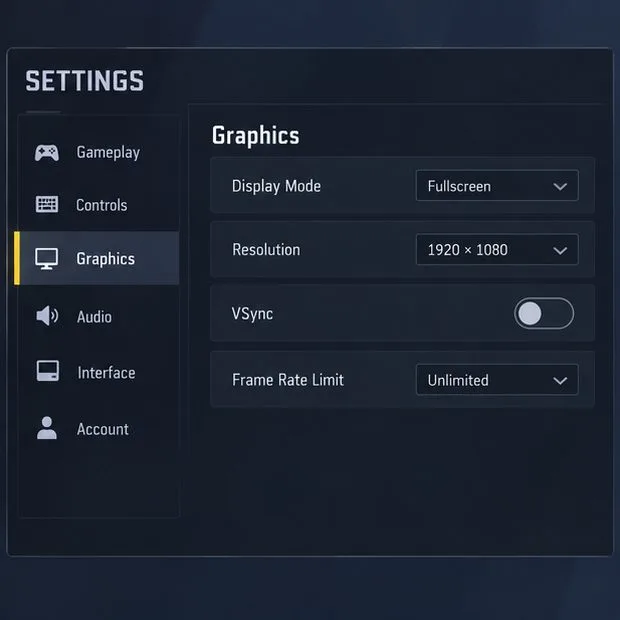
Find Motion Blur and set it to Off. Then find Depth of Field and set that to Off as well. Check the state shown beside each setting; do not assume that changing one automatically disables the other. If the control uses a slider rather than an On/Off switch in your current build, move it to its lowest or disabled position and read the displayed value before leaving the page.
Use only the in-game options for this change. Avoid editing configuration files, downloading graphics tweaks, or setting a configuration file to read-only just to remove blur. Those workarounds can stop normal settings from saving, may be overwritten by game updates, and are not needed when the controls are available in the menu.
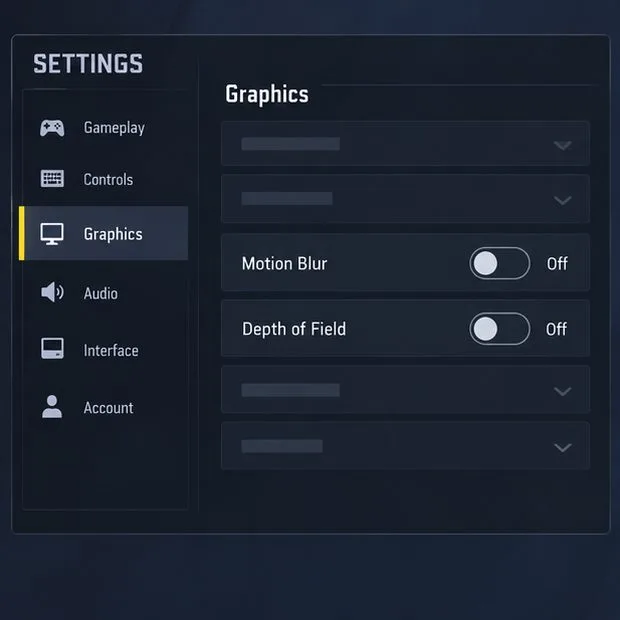
If the menu presents an Apply or Confirm prompt, accept it. Return to the lobby, open Practice, and compare a stationary view with a slow camera turn and a quick turn. Look for less smearing during movement and a more consistently sharp background. Use the same map area and camera speed for the comparison so you are not judging two very different scenes.
Reopen Graphics after the test and confirm that both effects still show Off. Some games save settings immediately, while others ask you to apply them; checking the displayed values is more reliable than assuming. If the options revert, change them again, accept any prompt, leave Settings normally, and reopen the page once before testing another match.
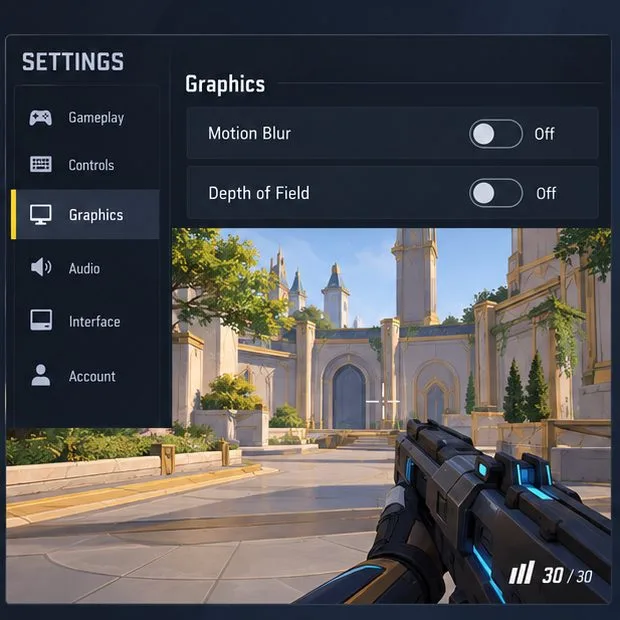
After confirming both settings remain Off, observe when softness appears. If it happens mainly during camera movement, check whether your frame rate is dropping at the same moment. Lowering other demanding graphics options may help a performance problem, but that is a separate test from disabling motion blur. Marvel Rivals’ official FAQ recommends updating the graphics driver or repairing the game client for persistent crashes or graphical errors; it does not claim that either step disables these visual effects.
If the whole scene looks soft even when the camera is still, check that the game is running at your display’s native resolution and inspect any resolution-scaling or upscaling option currently enabled. Change only one related setting at a time, then retest. Sharpening or anti-aliasing adjustments can change edge appearance, but they are not substitutes for Motion Blur and Depth of Field controls.
Some ability effects, cinematic transitions, or environmental effects may still look soft because these are separate from the two global options. Their appearance can vary by character and scene. If a blur effect occurs only during one animation, test another hero or a neutral Practice view before concluding that the settings failed.
First confirm that you are on the PC Graphics page and that the game has finished updating. Scroll through the full options list; a longer page can place effects below the first visible controls. If the exact label is still absent, do not assume that an unrelated Post-Processing preset is the same switch, and do not use unofficial configuration edits. The available controls can vary by platform or client build. Take a screenshot of the page and consult the official Marvel Rivals support channel for that build.
For PC performance or graphics problems beyond these two options, the official FAQ advises keeping graphics drivers current and repairing the game client when graphical errors persist. On a system with more than one GPU, it also describes setting Marvel Rivals to High performance in Windows Graphics settings. Those are troubleshooting steps for broader graphics problems, not required steps for turning off Motion Blur or Depth of Field.
The goal is a consistently readable image, not a guaranteed FPS increase. If the two options remain Off and the Practice test looks clearer, the change is working. If the scene remains soft everywhere, test resolution and performance settings individually or use the official support route instead of stacking unrelated tweaks.
Enable PUBG’s network statistics HUD to monitor ping and packet loss in a match. See where to find it, what the numbers mean, and what they cannot diagnose.
Learn how to import VALORANT crosshair codes, compare presets with manual settings and spectator copy, and fix common import issues.
Choose Dota 2 minimap size, hero icons, team colors, and background settings by readability, fewer misclicks, and clear results on your own display.
Fix Fortnite texture pop-in on PC with official steps for GPU drivers, file verification, DirectX 12, high-resolution textures, VRAM, SSDs, and stutter.
Learn what Heroes of the Storm minimap size and position options are verified, improve readability, and choose camera-click controls that suit you.
Set Super Smash Bros. Ultimate Quickplay to prefer hazards-off stages. Follow the Preferred Rules menu steps and learn why matchmaking may not always honor them.
Enable Server Latency and Packet Loss in Warzone to monitor connection quality, read the overlay, and use recurring spikes to guide troubleshooting.
Learn how to carry from mid lane in League of Legends by setting up waves, choosing safe roam windows, reading side lanes, and converting pressure into objectives.
Fix Minecraft Evoker spell problems with a safe vanilla test, version checks, log review, and a step-by-step way to isolate mod or datapack conflicts.
Fix PUBG stuck on Initializing on Steam with a focused checklist for PC service notices, launch options, game files, downloads, and connection issues.