Home
» 🎮 Esports
»
CS2 Jump-Throw Bind in Autoexec: What Still Works and How to Set It Up
CS2 Jump-Throw Bind in Autoexec: What Still Works and How to Set It Up
CS2 Jump-Throw Bind in Autoexec: What Still Works and How to Set It Up
An old CS2 jump-throw bind that makes one key both jump and release a grenade is not a dependable setup for Valve official servers. Valve’s August 19, 2024 release notes say binds combining multiple movement or attack commands are ignored by default, and its announcement says players suspected of automating multiple actions from one input may be kicked. You can still use autoexec.cfg for ordinary one-action binds. To jump-throw now, prime the grenade, jump, and release the attack button yourself in quick succession.
This walkthrough shows how to remove an outdated alias, keep a normal jump key in your autoexec, confirm the file loads, and practice a manual throw. It reflects Valve’s published guidance reviewed on October 17, 2026; the linked Valve pages remain the source for policy changes.
What still works in a CS2 autoexec
An autoexec.cfg is still useful for saving individual preferences and single-action key assignments. For example, one key may issue +jump. The issue is a bind that combines jump with attack release or another movement/attack action. Valve’s 2024 release notes list the affected commands and mention the cheat-protected cl_allow_multi_input_binds setting. That setting is not a safe matchmaking workaround, and this guide does not recommend using scripts, hardware macros, or protected-variable changes to restore a one-key throw.
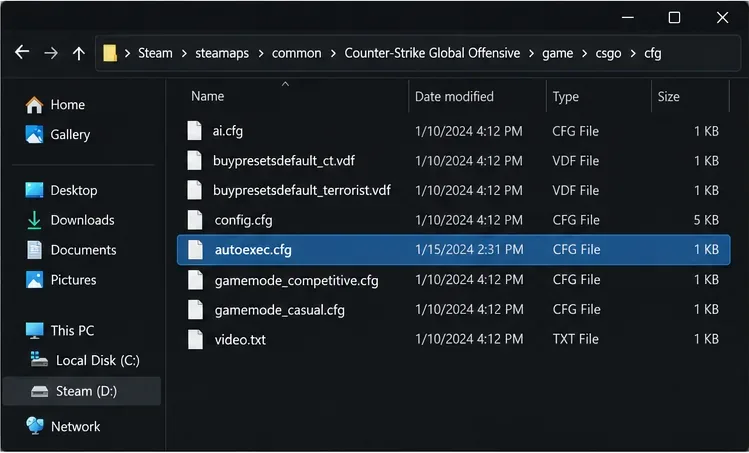
In Steam, open Library, right-click Counter-Strike 2, choose Properties, then Installed Files and Browse. From the game’s installation folder, open the configuration directory. A common Steam path ends with:
steamapps/common/Counter-Strike Global Offensive/game/csgo/cfg
Your Steam library may be on another drive, so use Steam’s Browse button instead of assuming a drive letter. Look for autoexec.cfg. If you create it, use a plain-text editor and save the exact .cfg extension. On Windows, show file-name extensions in File Explorer so the file does not accidentally become autoexec.cfg.txt. Back up an existing config before editing.
The cfg folder view highlights autoexec.cfg; confirm the actual path and extension on your installation.
2. Remove the old combined jump-throw alias
Open the file and search for old jump-throw names or aliases containing +jump, -attack, or -attack2. A legacy script may look similar to this:
alias "+jumpthrow" "+jump; -attack"
alias "-jumpthrow" "-jump"
bind "v" "+jumpthrow"
These lines are shown only to help identify old instructions. Delete the combined alias and its key assignment from the config you use for official matchmaking. Do not paste this example back into the file as a fix: it tries to automate the jump and grenade release from one key, the behavior Valve’s input change addresses. If you use a community server, follow its published rules; behavior on a custom server does not establish what is permitted or reliable on official servers.
3. Keep a normal one-action jump bind
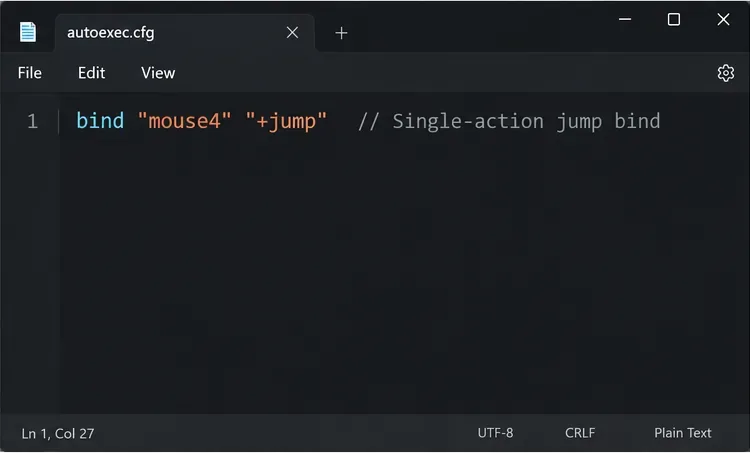
If you want a dedicated jump button, save a single-action line such as this in autoexec.cfg:
bind "mouse4" "+jump"
Replace mouse4 with a key or mouse button you can reach comfortably. You can keep the standard Space key instead; if you need to restore it explicitly, use bind "space" "+jump". Choose the assignment you want rather than adding unnecessary duplicate lines. Save the file as plain text with straight quotation marks.
This example assigns Mouse Button 4 to jump only; it does not release a grenade.
4. Load the file and check the key
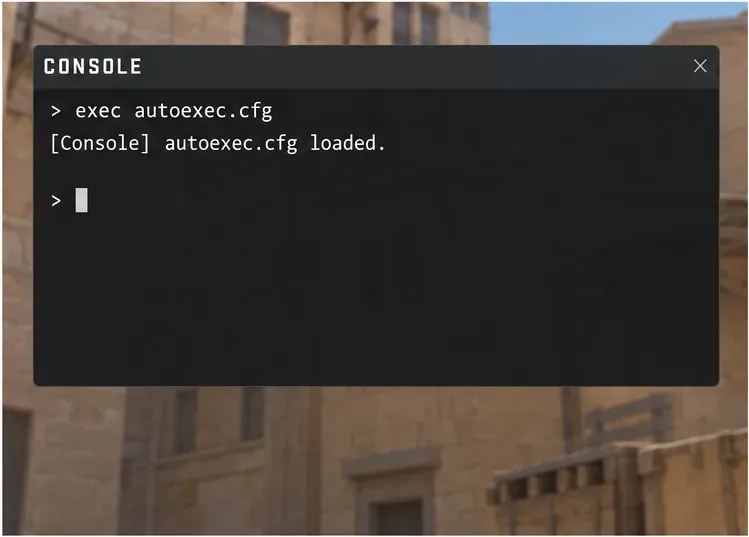
In CS2, open Settings, choose the Game tab, and set Enable Developer Console to Yes. Steam Support notes that the tilde key opens the console on English/US keyboard layouts; the key can differ with another layout. At the main menu, open the console and enter:
exec autoexec.cfg
Then query your chosen key, for example:
bind mouse4
Check that the binding points to +jump. If you prefer automatic execution at launch, Steam’s launch-options guidance explains the general process and notes that some console commands cannot be used as launch options. The commonly used +exec autoexec.cfg entry is optional; manually running exec autoexec.cfg is a direct way to test the file. A successful file load does not make a blocked multi-action bind supported.
Enter exec autoexec.cfg to load the file for the current session; console wording can vary.
If the file cannot be found, recheck the folder and extension. If it loads but the key does not jump, query the key again and check for a later config or in-game setting that overwrites it. Steam’s developer-console instructions for Counter-Strike 2 show where to enable the console in Settings.
5. Practice the jump-throw manually
Use an offline practice session and a grenade you can repeat. A basic standing smoke throw goes like this:
Stand at the lineup’s exact starting point and aim at its reference mark. Stop moving unless the lineup specifically requires a running approach.
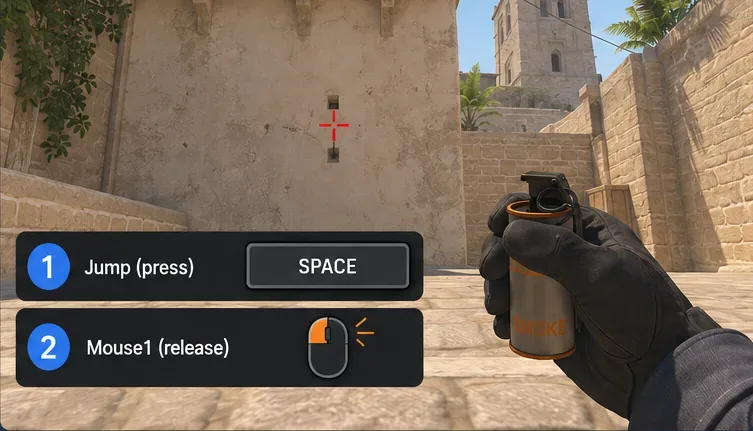
Equip the smoke and hold the primary attack button to prime the throw.
Press your jump key, then release the attack button yourself immediately afterward. Keep the two inputs close together, but do not combine them with a script or macro.
Watch the landing point, reset to the same position, and repeat. Adjust your timing only after checking that your aim and starting position match.
The throw uses two manual inputs: jump, then release the held attack button.
Standing, running, and walking lineups are different techniques, so use the movement pattern specified for the grenade lineup you are learning. A throw that varies may be caused by a changed start position, crosshair placement, movement, or release timing—not by a missing autoexec bind. Practice the same sequence several times before changing the config again.
Quick troubleshooting
What happens
What to check
exec autoexec.cfg cannot find the file
Use Steam’s Browse button, confirm the cfg folder, and verify the full filename is not .cfg.txt.
The jump key is not assigned after loading
Run bind mouse4 (or your key) and check for a later config that overwrites it.
The player jumps but keeps holding the grenade
A jump-only bind sends no attack release. Release the attack button manually.
The old one-key alias is ignored
Remove it; Valve’s notes say multi-action binds are ignored by default.
The smoke lands inconsistently
Repeat from the same position and aim, using the same movement and manual release timing.
The working setup is straightforward: the autoexec loads, your dedicated key performs one jump action, and you can complete the grenade throw with normal manual inputs. Keep those checks separate—the config can be correct even when a lineup still needs practice.