How to Check Real-Time Server Latency in the PUBG HUD
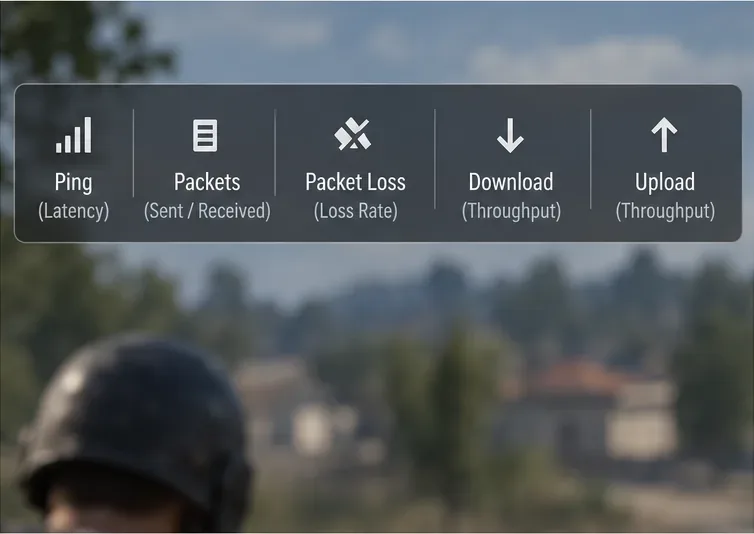
Enable PUBG’s network statistics HUD to monitor ping and packet loss in a match. See where to find it, what the numbers mean, and what they cannot diagnose.
For high FPS on a midrange GPU, start Marvel Rivals with low lighting, shadows, effects, and post-processing; keep textures at Medium if memory allows; use Quality upscaling; and leave frame generation off while establishing your baseline. On a supported NVIDIA GPU, enable Reflex. Then choose an FPS limit your PC can maintain during busy fights, rather than chasing the highest number in an empty training area.
This is a starting configuration for tuning, not a benchmarked guarantee. Resolution, CPU performance, GPU memory, cooling, and the current game build all affect the result. A stable 1080p setup can be more useful than a sharper 1440p setup that repeatedly slows down when abilities fill the screen.
Here, it means a mainstream discrete graphics card used for 1080p or 1440p gaming, rather than a claim that every card sold at a similar price performs equally. Different GPU generations, memory capacities, and laptop power limits make a single model-to-FPS table misleading without controlled testing.
The publisher’s official PC requirements list RTX 2060 Super, RX 5700 XT, and Intel Arc A750 as recommended graphics examples, alongside 16GB of RAM. Meeting that list does not promise 144 FPS, a particular graphics preset, or consistent performance on every map. Use your actual combat performance to decide how far to raise settings.
Source check: October 8, 2026. The recommendations below use documented graphics controls and verified publisher and GPU-vendor features. No performance measurements were collected for this article. Menu labels and availability can vary with hardware and updates; the pictures are simplified interface examples, not captured benchmarks.
Start with lighting and reflections, then shadows and effects. These are sensible places to trade visual richness for rendering headroom. Do not interpret that priority as a verified percentage ranking: the cost of each setting depends on the scene and your hardware.
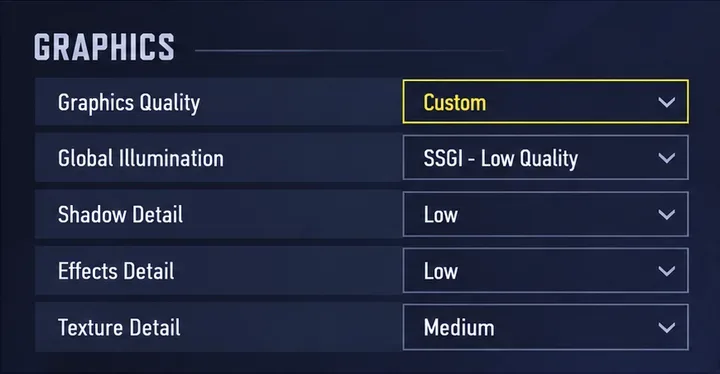
SCUF, the gaming hardware manufacturer, lists the relevant controls in its Marvel Rivals PC settings reference. Its documented options include SSGI – Low Quality, Screen Space Reflections, and the model, texture, shadow, effects, and foliage detail settings. The table below is a conservative starting recommendation, rather than a reproduction of its preset.
| Setting | Starting choice | When to reconsider |
|---|---|---|
| Graphics Quality | Custom | Use individual controls to identify which change helps |
| Global Illumination | SSGI – Low Quality | Raise lighting quality after your combat FPS target is stable |
| Reflection Quality | Screen Space Reflections | Compare a lower or disabled option if your build offers it |
| Model Detail | Low; try Medium if needed | Raise it when character or object detail is distracting |
| Post-Processing | Low | Increase only if you prefer the appearance and have headroom |
| Shadow Detail | Low | Try Medium when low-quality shadows look distracting |
| Texture Detail | Medium | Lower it if memory pressure or texture loading becomes a problem |
| Effects Detail | Low | Judge it during overlapping abilities, not only while idle |
| Foliage Quality | Low | Raise it last if environmental detail matters to you |
Textures deserve separate treatment. Lower texture detail can relieve memory pressure, but it is not automatically the biggest average-FPS improvement when the current textures fit comfortably in GPU memory. The publisher’s technical FAQ specifically recommends reducing graphics settings, including texture quality, when performance is slow despite meeting the requirements.
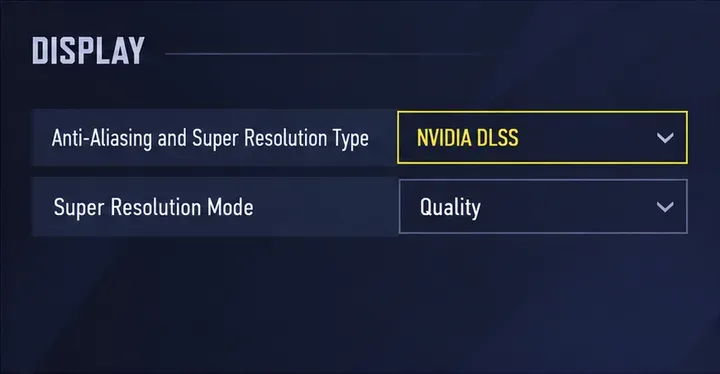
Keep the display output at your monitor’s native resolution initially, then use the game’s available super-resolution setting to reduce the internal rendering workload. Upscaling reconstructs the displayed image from a lower-resolution input; it can preserve interface sharpness better than simply reducing the entire display resolution.
On an RTX GPU with DLSS available, start with DLSS Super Resolution: Quality. NVIDIA’s DLSS technical overview explains the distinction between lower-resolution reconstruction and generated frames. NVIDIA also confirms DLSS Super Resolution support in its Marvel Rivals technology coverage.
For other GPUs, compare the compatible upscalers actually offered in your game, such as FSR or EPIC TSR. Start with a quality-oriented mode instead of assuming the most aggressive performance setting will be acceptable. This guide does not establish the current availability of every FSR or XeSS version on every GPU.
At 1080p, inspect moving enemies carefully before going below Quality: aggressive upscaling can sacrifice the fine detail you need to track small targets. At 1440p, Quality is still a good first test; try Balanced if the GPU remains the limiting factor. Performance mode is a further compromise when additional headroom matters more than image detail.
Sharpening is a preference adjustment, not a proven FPS booster. Increase it only enough to improve the image; excessive sharpening can make outlines and foliage look harsh. Compare motion, not just a still menu background.
Leave it off for your initial competitive baseline. Frame generation adds displayed frames between rendered frames. That can improve perceived smoothness, but a higher displayed FPS number does not mean the game simulation and your input are updating at that same rate.
Once normal rendering is stable, you can test frame generation separately if your hardware supports it. Compare responsiveness, visual artifacts around moving characters, and pacing during fights. Do not use it to hide a low or erratic base frame rate.
On supported NVIDIA hardware, turn on the game’s Reflex low-latency option. Reflex is designed to reduce PC latency; it serves a different purpose from adding intermediate frames. Availability of frame-generation variants depends on GPU generation and the game’s implementation, so do not assume a feature advertised for a newer card also works on an older RTX model.
Use VSync off as the initial low-latency comparison, accepting that tearing may be visible. If tearing bothers you, configure your display’s supported variable-refresh setup and compare synchronization options. There is no universal VSync and frame-cap combination that fits every monitor and driver configuration.
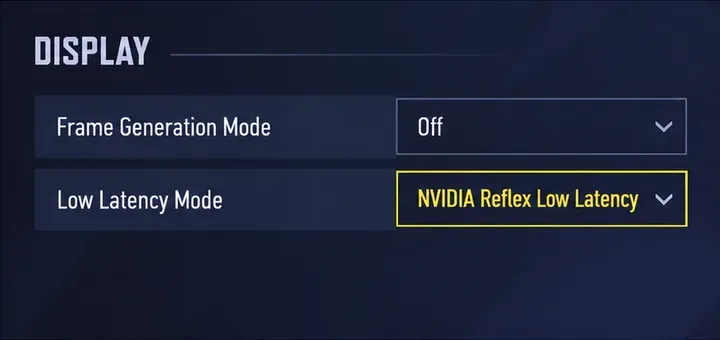
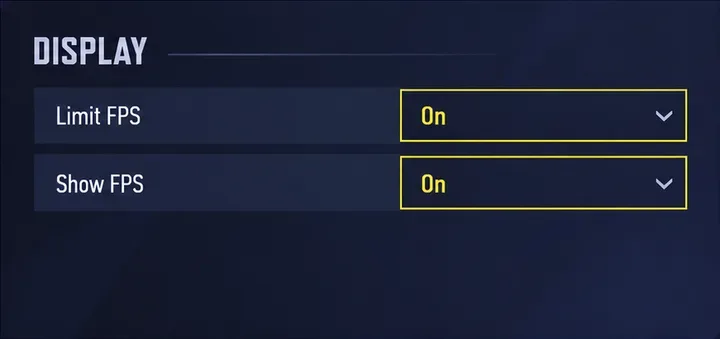
Choose a target your system can sustain in representative combat. A 120 FPS limit is a reasonable example to test on a high-refresh display, but it is not a claim that your card will deliver 120 FPS. A PC that repeatedly falls below that target may feel more consistent with a lower sustainable cap.
Frame time is the time taken to deliver a frame. As a mathematical reference, 120 FPS corresponds to about 8.3 milliseconds per frame, while 60 FPS corresponds to about 16.7 milliseconds. Sudden long frames can feel disruptive even when the average FPS looks high.
The publisher’s laptop performance guidance recommends limiting frame rate to reduce heat-related throttling. Laptop users should also check their manufacturer’s performance mode, ventilation, and discrete-GPU routing where supported. A laptop GPU with a familiar model name can still behave differently from its desktop counterpart.
Your GPU may not be the only limit. As a diagnostic comparison, lower the internal rendering resolution substantially while leaving the same scene and other settings unchanged. A meaningful improvement suggests a graphics-rendering limit. Little improvement can point toward another constraint, such as CPU work, memory pressure, an existing frame cap, or throttling. This is a clue, not a definitive hardware diagnosis.
On March 19, 2026, the publisher documented an In-Game Performance Optimization test aimed at CPU rendering performance during battles. The announcement describes an entry under Settings > Other, a privacy agreement and download, and a game restart before it takes effect. Check whether your current client offers it, read the agreement, and compare performance before keeping it enabled. The announcement does not establish a universal FPS gain.
Memory-related stutters also differ from continuously low FPS. The publisher’s April 10, 2025 shader-compilation announcement describes an experimental launcher option for memory pressure, particularly on systems with 16GB of RAM or less. It also lists possible initial material stutters and an interaction with FSR3 Frame Generation on CPUs with six or fewer threads. Treat that dated guidance as a feature to check for, not proof that every current build needs it.
Consider the low-resolution pack if you prioritize lighter resources over maximum texture fidelity. The publisher’s resource-pack announcement, displayed as May 15, 2026, confirms separate high- and low-resolution resources. It says the lower-resolution pack reduces installation size and may reduce visual fidelity; it does not promise a particular FPS increase.
On Steam, the announcement identifies a High-Resolution Resource Pack DLC toggle. Use the official platform controls when available, rather than unofficial graphics packs. The announcement still labels Epic’s implementation as coming soon, so its present availability was not established here. Resource-pack selection and the in-game Texture Detail setting are separate choices.
Work through four comparison stages: establish the low/custom graphics baseline, compare upscaling quality, evaluate latency and frame generation separately, then select a sustainable cap. Change one group at a time and keep notes about output resolution, upscaler mode, and whether generated frames were enabled.
Use training to check image clarity and controls, then evaluate several normal matches with busy fights. Keep the same hero and similar conditions when possible, while recognizing that different maps and opponents prevent a perfectly controlled comparison. Watch the slowdowns, aiming feel, and visible artifacts as well as the FPS counter.
After an update, recheck the settings and allow any required shader compilation to finish before drawing conclusions. Keep the configuration that preserves target visibility and consistent combat performance. Raise visual settings gradually once that baseline holds, rather than treating one preset as permanently best for every midrange PC.
Enable PUBG’s network statistics HUD to monitor ping and packet loss in a match. See where to find it, what the numbers mean, and what they cannot diagnose.
Learn how to import VALORANT crosshair codes, compare presets with manual settings and spectator copy, and fix common import issues.
Choose Dota 2 minimap size, hero icons, team colors, and background settings by readability, fewer misclicks, and clear results on your own display.
Fix Fortnite texture pop-in on PC with official steps for GPU drivers, file verification, DirectX 12, high-resolution textures, VRAM, SSDs, and stutter.
Learn what Heroes of the Storm minimap size and position options are verified, improve readability, and choose camera-click controls that suit you.
Set Super Smash Bros. Ultimate Quickplay to prefer hazards-off stages. Follow the Preferred Rules menu steps and learn why matchmaking may not always honor them.
Enable Server Latency and Packet Loss in Warzone to monitor connection quality, read the overlay, and use recurring spikes to guide troubleshooting.
Learn how to carry from mid lane in League of Legends by setting up waves, choosing safe roam windows, reading side lanes, and converting pressure into objectives.
Fix Minecraft Evoker spell problems with a safe vanilla test, version checks, log review, and a step-by-step way to isolate mod or datapack conflicts.
Fix PUBG stuck on Initializing on Steam with a focused checklist for PC service notices, launch options, game files, downloads, and connection issues.