How to Check Real-Time Server Latency in the PUBG HUD
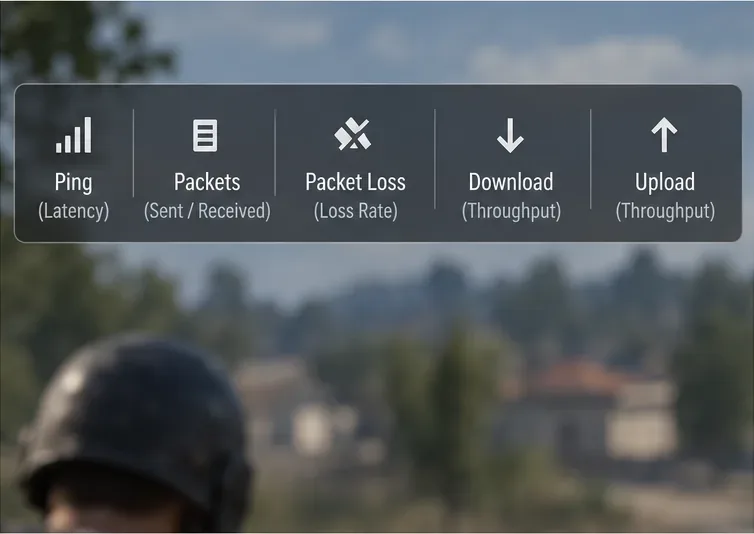
Enable PUBG’s network statistics HUD to monitor ping and packet loss in a match. See where to find it, what the numbers mean, and what they cannot diagnose.
If your short-hop aerials feel inconsistent on a GameCube controller, the problem is often not the controller itself. It is usually that jump and attack are competing for the same thumb, or that your layout makes you choose between fast inputs and precise aerial timing. For most players, the cleanest starting point is to move Jump to a shoulder button, keep A as Attack, leave Y as a second Jump input, keep Z for Grab, and use the C-stick for directional aerials.
As of Super Smash Bros. Ultimate version 13.0.5, released September 1, 2026, Nintendo’s latest published update notes do not describe a change to these short-hop input methods. Nintendo still documents the short-hop attack shortcut as pressing A and a jump button together, while an earlier update added the ability to short hop by pressing two jump buttons at the same time. Those two shortcuts are the foundation of the mapping below.
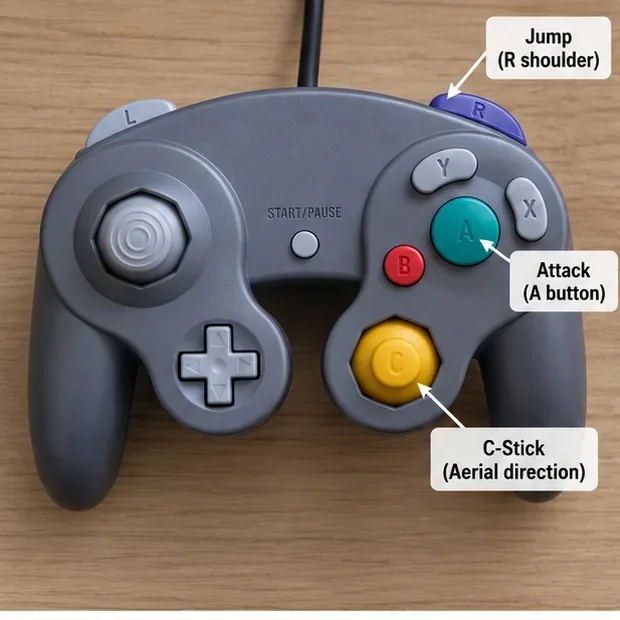
Best all-around starting point: map R to Jump, keep Y as Jump, keep A as Attack, keep Z as Grab, use L for Shield, and set the C-stick to Tilt Attack. Turn Tap Jump off if accidental up-jumps interfere with your movement.
This layout does not make every aerial automatically better. What it does is separate important jobs across different fingers. Your right index finger can jump with R while your right thumb stays ready for A or the C-stick. That makes rising aerials easier to repeat without forcing the thumb to bounce from Y to A. Keeping Y as Jump also preserves Nintendo’s two-jump-button short-hop shortcut.
| Function | Recommended input | Why it helps |
|---|---|---|
| Jump | R | Moves jump off the face buttons and frees the right thumb for attack inputs. |
| Secondary Jump | Y | Works with R for the two-jump short-hop shortcut and remains familiar for normal jumping. |
| Attack | A | Preserves the standard attack button and works with the jump-plus-attack shortcut. |
| Aerial direction | C-stick / Tilt Attack | Lets the thumb choose an aerial direction without changing the left stick’s movement input. |
| Grab | Z | Keeps the native shoulder grab position available. |
| Shield | L | Leaves one large trigger dedicated to defense while R handles jump. |
| Tap Jump | Off for most learners | Reduces accidental jumps during upward movement inputs; keep it on if it is already central to your muscle memory. |
The main benefit is finger independence. With face-button jump, your right thumb may need to press Y or X, release it quickly, and then move to A or the C-stick. That can work very well after practice, but it adds travel and timing pressure. A shoulder jump lets the index finger handle the jump while the thumb prepares the aerial.
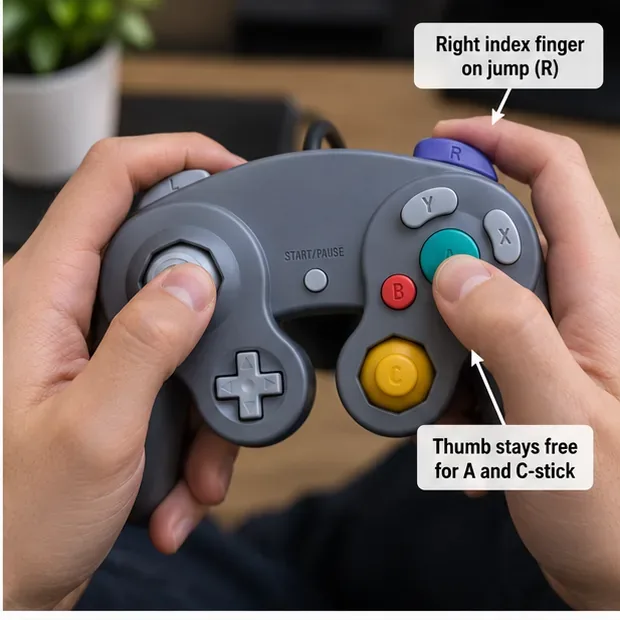
R is not objectively superior to L. If your right hand feels crowded, try L = Jump and R = Shield. The important design principle is the same: put Jump on a shoulder so the thumb does not have to do everything. Choose the side that feels natural after several practice sessions, not after only a few minutes.
No. Use it when you specifically want an aerial to come out immediately as you leave the ground. Nintendo’s own advanced-strategy page states that pressing the A Button and the jump button at the same time performs a short-hop attack. That makes R + A a very simple rising-aerial input with the recommended mapping.
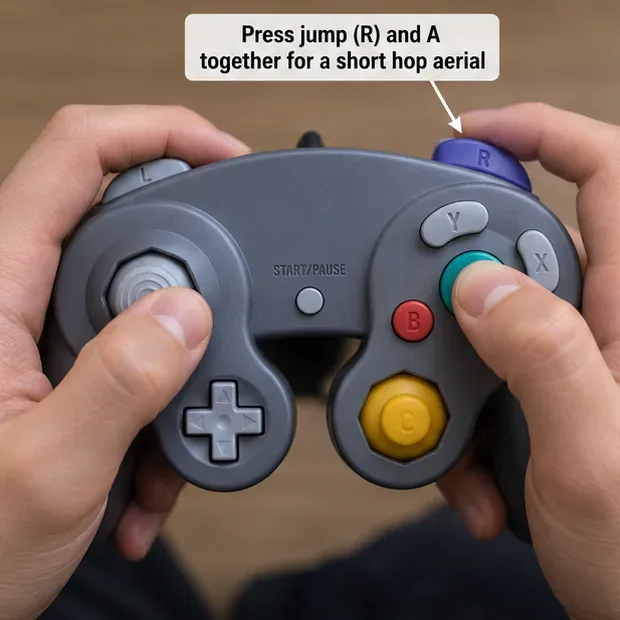
However, the shortcut commits to an aerial immediately. It is less suitable when you want to short hop first and delay the attack, drift before swinging, fast-fall before an aerial, or choose the aerial direction after seeing what the opponent does. For those situations, use a short hop without an attack and then press A or the C-stick at the timing you want.
Nintendo documents the short-hop attack shortcut on its official Super Smash Bros. Ultimate advanced-strategy page.
It can be. Nintendo added a specific behavior in version 2.0.0, released January 29, 2019: pressing both jump buttons at the same time causes a short hop. With R and Y both mapped to Jump, you can press R + Y together to get the short hop without automatically throwing out an attack.
That gives you a useful middle ground. You get a reliable short-hop input, but your aerial can still be delayed or aimed afterward. For players who struggle to release a single jump button quickly enough, this is often the easiest method to practice first.
The behavior is recorded in Nintendo’s official Super Smash Bros. Ultimate update history.
For this layout, Tilt Attack is the most practical default. In the air, the C-stick gives you a separate directional attack input, so you can keep the left stick focused on drift and positioning. On the ground, Tilt Attack also makes tilt moves easier to access without relying on fine analog-stick timing.
If you already use Smash Attack on the C-stick and your aerial timing is consistent, there is no need to change only for short hops. The larger goal is to reduce unnecessary finger movement. A control scheme you can execute under pressure is better than a theoretically cleaner layout you constantly misinput.
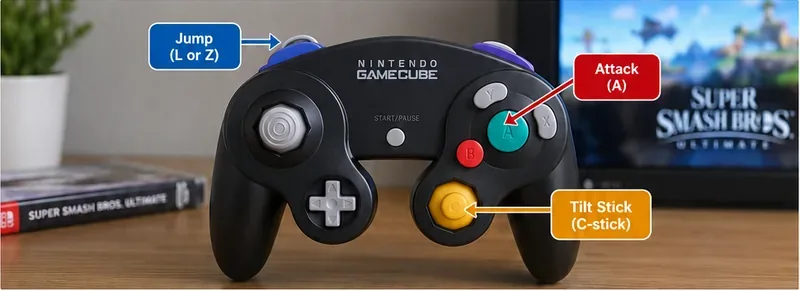
For players rebuilding their controls around shoulder Jump, turning Tap Jump off is usually easier to learn. It prevents an upward left-stick input from doubling as a jump, which can help when you are trying to perform grounded up-tilts, up-smashes, or precise movement without leaving the ground.
That said, Tap Jump is not “wrong.” Some experienced players rely on it for specific sequences or simply have years of muscle memory built around it. If turning it off makes your overall movement worse, keep it on and evaluate the complete control scheme rather than changing a setting just because it is common advice.
This is the lowest-complexity option for rising neutral air, forward air, back air, up air, or down air when the attack should begin as soon as the short hop starts. It is especially useful when learning a character’s basic pressure or anti-air patterns.
This uses the two-jump shortcut without forcing an attack. After the short hop, you can drift, wait, or use A/C-stick at a later moment. It is a strong choice for players who want consistent jump height without relying on a very quick single-button release.
Once your timing is reliable, a quick shoulder-button tap gives you the most flexible manual sequence because you are not tying the jump to another input. This is useful when your character benefits from varying the timing of aerials or mixing empty short hops with attacks.
For the original wired GameCube controller on Nintendo Switch, Nintendo says a GameCube Controller Adapter is required and the controller is used with the system in TV mode. Nintendo also notes that the controller is recognized by the Switch as a standard USB controller. If your inputs are not appearing in Smash, solve the connection problem before judging the mapping.
See Nintendo’s official GameCube controller setup instructions for the adapter and connection steps.
Not according to Nintendo’s currently published notes. The latest official update is version 13.0.5, released September 1, 2026, and its listed change concerns invalid data sent or received in online battles. It does not list a change to jump mapping, short-hop attacks, or the two-jump-button short-hop behavior.
You can verify the current version and update notes on Nintendo’s official Super Smash Bros. Ultimate update page.
If you want one mapping to try first, use R = Jump, Y = Jump, A = Attack, Z = Grab, L = Shield, C-stick = Tilt Attack, and Tap Jump = Off. It gives you three useful short-hop options: a quick R tap for manual control, R + A for an immediate short-hop aerial, and R + Y for a reliable short hop before choosing your attack.
Do not treat the layout as a rule. The best mapping is the one that reduces finger conflict while preserving the defensive, movement, and grab inputs you use most. Give the new layout enough time to become familiar, and judge it by consistency in matches—not by whether it feels instantly comfortable on the first training session.
Enable PUBG’s network statistics HUD to monitor ping and packet loss in a match. See where to find it, what the numbers mean, and what they cannot diagnose.
Learn how to import VALORANT crosshair codes, compare presets with manual settings and spectator copy, and fix common import issues.
Choose Dota 2 minimap size, hero icons, team colors, and background settings by readability, fewer misclicks, and clear results on your own display.
Fix Fortnite texture pop-in on PC with official steps for GPU drivers, file verification, DirectX 12, high-resolution textures, VRAM, SSDs, and stutter.
Learn what Heroes of the Storm minimap size and position options are verified, improve readability, and choose camera-click controls that suit you.
Set Super Smash Bros. Ultimate Quickplay to prefer hazards-off stages. Follow the Preferred Rules menu steps and learn why matchmaking may not always honor them.
Enable Server Latency and Packet Loss in Warzone to monitor connection quality, read the overlay, and use recurring spikes to guide troubleshooting.
Learn how to carry from mid lane in League of Legends by setting up waves, choosing safe roam windows, reading side lanes, and converting pressure into objectives.
Fix Minecraft Evoker spell problems with a safe vanilla test, version checks, log review, and a step-by-step way to isolate mod or datapack conflicts.
Fix PUBG stuck on Initializing on Steam with a focused checklist for PC service notices, launch options, game files, downloads, and connection issues.