How to Check Real-Time Server Latency in the PUBG HUD
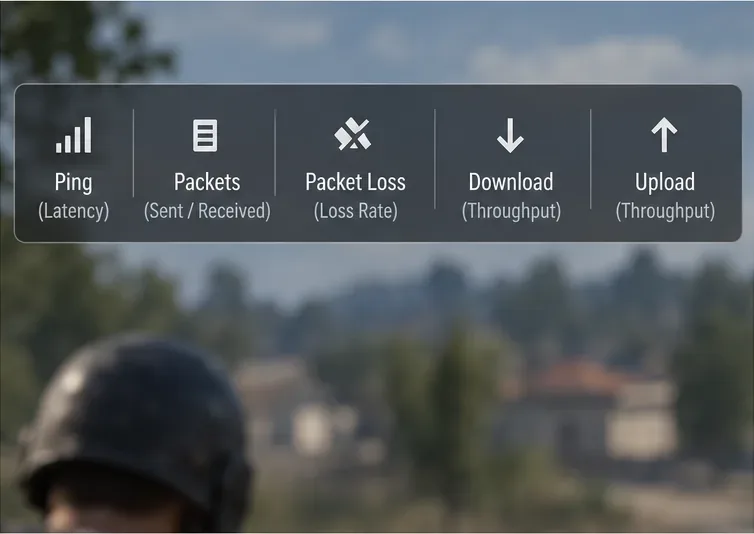
Enable PUBG’s network statistics HUD to monitor ping and packet loss in a match. See where to find it, what the numbers mean, and what they cannot diagnose.
For a three-finger claw layout, use one index finger for firing while your thumbs handle movement and aiming. This separates the fire action from your right-thumb aim, but the best custom HUD depends on your screen size, grip, and which controls you use most. Start with a simple layout, keep the aiming area open, then adjust it in the Training Ground before using it in matches.
Recent Garena updates make the setup process easier to personalize. OB52 added HUD recommendations and share codes; OB53 added Smart Adjust, which suggests layout changes from your screen-tap data and HUD usage patterns. These tools can help you find a starting layout, but Garena does not publish one official three-finger coordinate map for every phone. Treat the placements below as a practical template, not a universal pro preset.
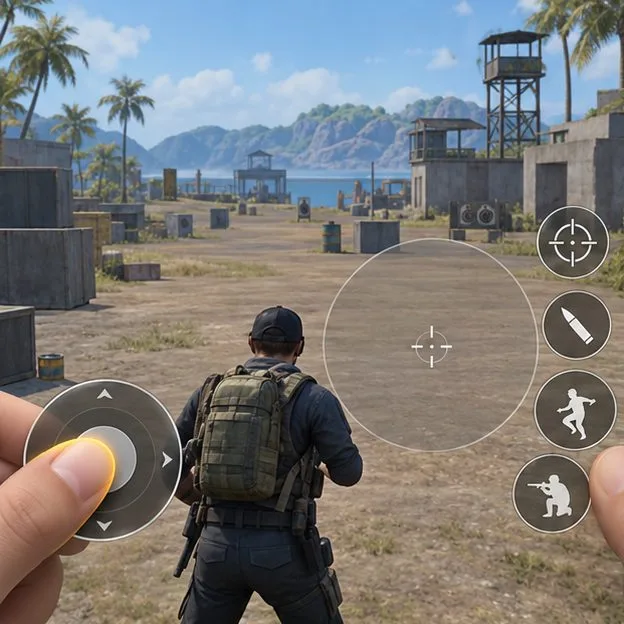
A three-finger claw uses three touch points at once: your left thumb controls the movement joystick, your left index finger taps the fire button near the upper-left side, and your right thumb aims and uses the most important right-side actions. The word “claw” describes the hand posture that lets an index finger reach a button near the top edge while the thumb remains on movement. You do not need to bend your fingers painfully; a comfortable grip matters more than copying another player’s exact layout.
Before moving buttons, identify your normal thumb reach. Hold the phone the way you actually play and note where each finger can tap without shifting your grip. If reaching the upper-left fire button makes the phone unstable, move it inward or try a different hand arrangement. The layout should feel controlled, not strained.
| Control area | Suggested placement | Keep clear |
|---|---|---|
| Movement joystick | Lower-left, where your left thumb rests naturally | Screen edge and nearby buttons that could interrupt movement |
| Fire button | Upper-left, within easy reach of the left index finger | Very top corner, where a case or grip can make tapping awkward |
| Aiming zone | Open center-right area for right-thumb swipes | Jump, crouch, prone, and utility icons overlapping the swipe path |
| Action buttons | Right edge in a loose arc around the thumb’s comfortable reach | Clustering every button together or covering the crosshair view |
Open the game’s Settings and look for the in-match HUD controls. Garena’s OB50 notes say switchable HUD designs were moved to Settings > In-Match. The HUD Recommendation System is listed under Settings > HUD in the OB52 notes. Menu labels can shift with later updates or modes, so use the in-game section names if your version presents them differently.
If you browse a recommended or shared layout, inspect the import options before applying it. Garena says recommended player HUD presets and share codes can include sensitivity settings, and the share flow lets you choose whether to sync those sensitivities. If you only want the button arrangement, leave sensitivity syncing off. Keep a copy of your current layout or note the settings so you can return to them.
Place the primary fire control in the upper-left region, with enough room from the edge for a reliable tap. Keep it distinct from the joystick and any other button you may hit while moving. Make the button large enough to tap consistently, but not so large that it blocks important visual information. In a three-finger setup, the left index should be able to fire while the left thumb continues steering.
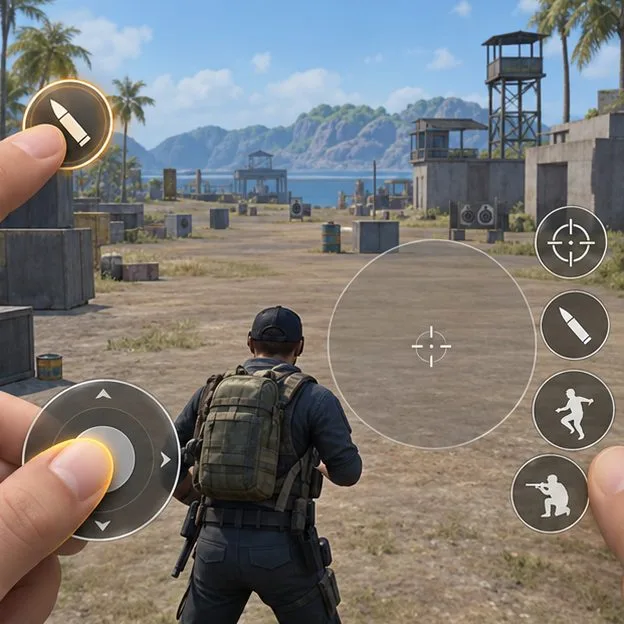
Keep the center-right portion of the screen open for aiming. Put the actions you press most often—such as jump, crouch, prone, or a utility action—along the right edge where your right thumb can reach them with short movements. Avoid placing a button directly over the area where you make regular camera swipes. Separate actions that have different consequences so a fast thumb movement does not trigger the wrong one.
There is no single correct order for every player. If you use a Gloo Wall frequently, make its control easy to reach without covering the reticle. If you rarely use an action in a particular mode, keep it farther from your main thumb path or hide it only if the current HUD editor permits that. Keep essential actions visible until you are sure you can locate them during a fight.
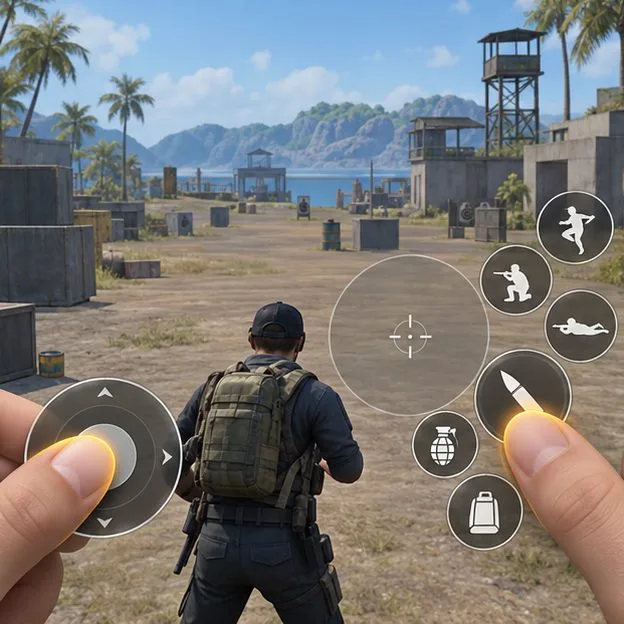
Use the HUD editor’s button size and transparency controls to make the important controls easy to see and reach. Change one button, test it, then move to the next. An oversized fire button can cover the scene; a nearly invisible action button can be hard to find under pressure. The useful setting is the smallest size and lowest opacity that you can still tap and identify consistently on your device.
Garena’s OB53 Smart Adjust can offer suggestions based on how you tap and use the HUD. Review the suggestions rather than accepting every change automatically: your test data may come from a different grip or mode than the one you want to optimize. HUDs can also be shared by link or QR code, which makes it convenient to compare a template without treating it as a finished personal layout.
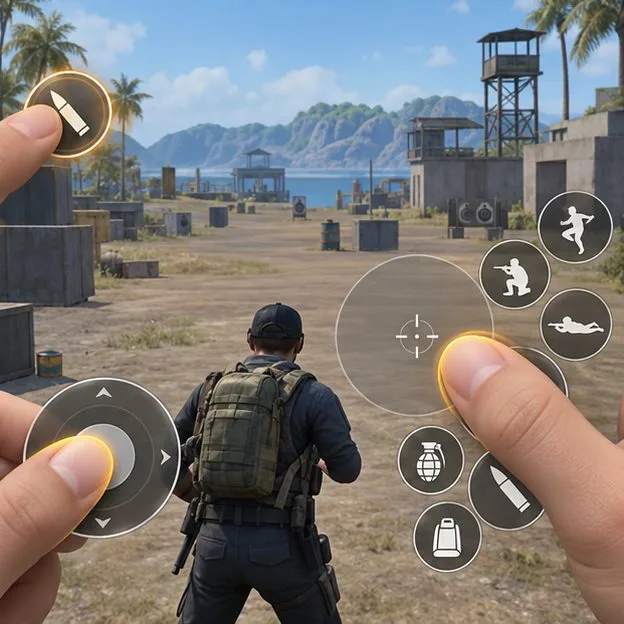
Open the Training Ground and test the same short sequence several times: move and fire, turn while firing, jump and aim, then use a utility button while changing direction. The goal is not to achieve a particular number of eliminations. Check whether your fingers can complete the actions without lifting the movement thumb, losing the target during a swipe, or pressing a neighboring control by mistake.
After testing, change only one placement at a time and repeat the sequence. A useful layout should let you move, aim, and fire at the same time without hand strain. If a three-finger grip feels uncomfortable, return to a simpler layout; using more fingers is a personal control choice, not a requirement for playing Free Fire well.
Enable PUBG’s network statistics HUD to monitor ping and packet loss in a match. See where to find it, what the numbers mean, and what they cannot diagnose.
Learn how to import VALORANT crosshair codes, compare presets with manual settings and spectator copy, and fix common import issues.
Choose Dota 2 minimap size, hero icons, team colors, and background settings by readability, fewer misclicks, and clear results on your own display.
Fix Fortnite texture pop-in on PC with official steps for GPU drivers, file verification, DirectX 12, high-resolution textures, VRAM, SSDs, and stutter.
Learn what Heroes of the Storm minimap size and position options are verified, improve readability, and choose camera-click controls that suit you.
Set Super Smash Bros. Ultimate Quickplay to prefer hazards-off stages. Follow the Preferred Rules menu steps and learn why matchmaking may not always honor them.
Enable Server Latency and Packet Loss in Warzone to monitor connection quality, read the overlay, and use recurring spikes to guide troubleshooting.
Learn how to carry from mid lane in League of Legends by setting up waves, choosing safe roam windows, reading side lanes, and converting pressure into objectives.
Fix Minecraft Evoker spell problems with a safe vanilla test, version checks, log review, and a step-by-step way to isolate mod or datapack conflicts.
Fix PUBG stuck on Initializing on Steam with a focused checklist for PC service notices, launch options, game files, downloads, and connection issues.