How to Check Real-Time Server Latency in the PUBG HUD
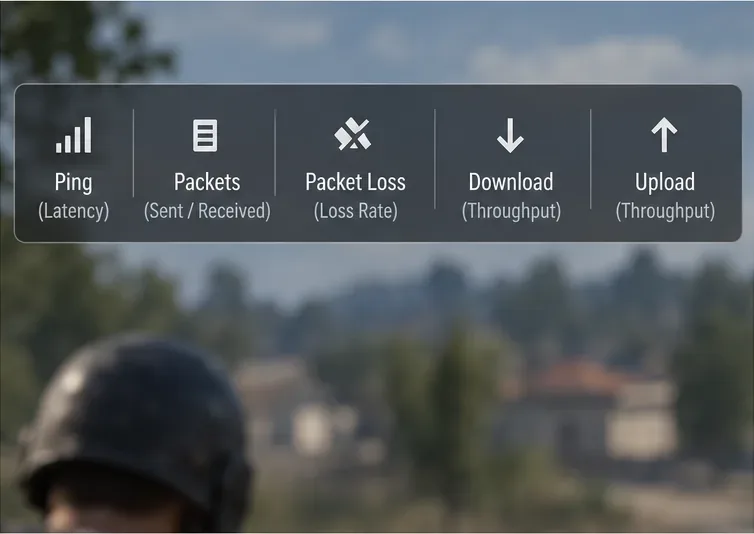
Enable PUBG’s network statistics HUD to monitor ping and packet loss in a match. See where to find it, what the numbers mean, and what they cannot diagnose.
For most hitscan heroes in Overwatch 2, a compact static crosshair is the safest starting point: high-contrast color, thin lines, a small center gap, full opacity, and little or no center dot. The goal is not to make the reticle “match” the size of enemy hitboxes. It is to give your eyes a stable reference for flicks, micro-corrections, and tracking without covering the head you are trying to hit.
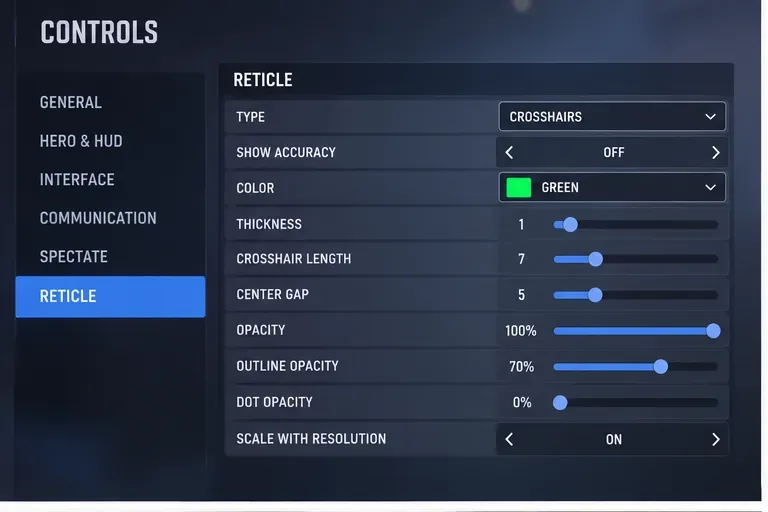
A useful baseline for precision hitscan heroes is:
| Setting | Recommended baseline | Why |
|---|---|---|
| Type | Crosshairs | Easy to center during both flicks and tracking |
| Show Accuracy | Off | Keeps the reticle visually stable |
| Color | Green, cyan, or magenta | High contrast against most maps; choose what you see fastest |
| Thickness | 1 | Minimizes target obstruction |
| Crosshair Length | 6-8 | Visible without becoming a large screen element |
| Center Gap | 4-6 | Leaves the exact aim point readable |
| Opacity | 100% | Keeps the reticle consistent in bright fights |
| Outline Opacity | 60-100% | Helps the reticle survive bright and dark backgrounds |
| Dot Opacity | 0% initially | Avoids covering tiny distant targets |
Those numbers are practical recommendations, not Blizzard-prescribed competitive settings. Blizzard officially added custom reticles under the Controls menu years ago and later expanded reticle options such as Outline Opacity. The exact best values still depend on your monitor size, resolution, eyesight, sensitivity, and which hero you are playing. See Blizzard's original custom reticle announcement and subsequent reticle outline update.
Verified: Overwatch's hit detection is controlled by weapon projectile size and hero hit volumes, not by your reticle graphics. In the current October 2026 live patch notes, Blizzard reduced the global size of “large” hitscan projectiles from 0.07 to 0.04 meters and “small” hitscan projectiles from 0.04 to 0.02 meters after hit-volume updates. That change affects shot registration; changing Crosshair Length or Center Gap does not.
This also connects to the major Season 9 systemic change from 2024, when Blizzard increased damage-dealing projectile sizes to improve hit consistency against Overwatch's fast movement. The important lesson is that crosshair size is visual information only. You should make it easier to aim, not try to map it literally onto invisible hit volumes. Blizzard explains the original reasoning in its Season 9 gameplay systems overview. For the current values, check the official Overwatch patch notes.
Action: choose a reticle that stays visible while covering as little of the target as possible. Do not enlarge it because you believe it increases the effective hit area.
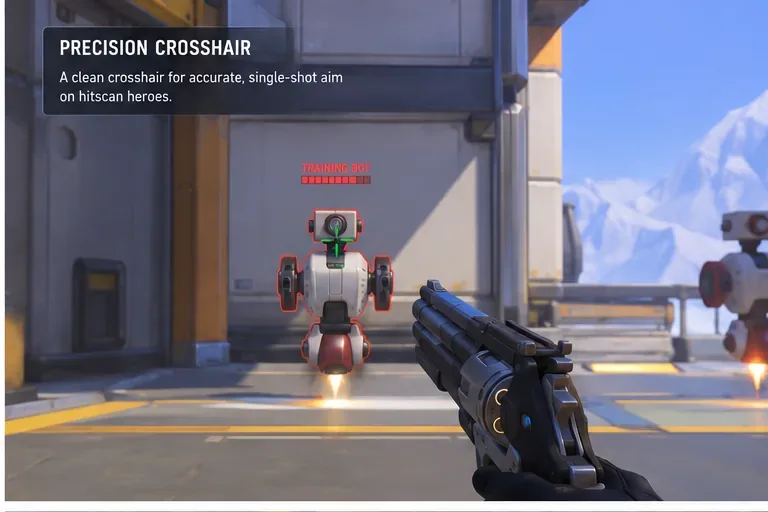
Cassidy rewards deliberate single-shot placement and quick horizontal corrections. A compact cross is usually easier to reacquire after recoil and fast camera movement than a large dynamic shape.
Recommended Cassidy starting point: Crosshairs, Show Accuracy Off, Thickness 1, Length 6, Center Gap 4, Opacity 100%, Outline 70%, Dot Off. Green or cyan are safe color choices if they remain distinct from enemy outlines and environmental effects on your display.
Why this works: the open center makes small heads visible at medium range, while short arms still give enough directional structure for quick flicks. A center dot is optional, but if you add one, keep it small enough that it does not cover a distant head.
Action: test 50-100 shots in the Practice Range. If you repeatedly lose the crosshair during fast turns, increase Length from 6 to 8 before increasing Thickness.
Ashe is a conditional case because you aim both from the hip and through her sights. A very large hip-fire crosshair can feel reassuring but adds clutter when you are trying to place a precise scoped shot immediately afterward.
Recommended Ashe starting point: use the same compact cross as Cassidy, or test a small dot if your eyes acquire dots faster. For a dot-first setup, keep the dot visible but small and retain enough outline to prevent it disappearing against bright sky or explosions.
Common misunderstanding: a dot is not automatically “more accurate” than a cross. It simply removes peripheral reticle information. Some players center a dot more naturally; others lose it during hectic movement.
Action: compare both layouts in real matches, not only stationary range shots. If you lose the dot while strafing or dynamite effects fill the screen, return to the compact cross.
Widowmaker's scoped view already provides a dedicated sight picture, so an oversized general reticle offers little benefit. A tiny center reference or compact cross is usually enough for unscoped positioning and close emergency shots.
Recommended Widowmaker starting point: small dot or very short cross; high opacity; enough outline to stay visible. Avoid a thick dot that hides the center of a distant silhouette.
What is conditional: monitor resolution and viewing distance matter a lot here. A two-pixel-looking dot that is excellent on one screen may be hard to see on a high-density display viewed farther away.
Action: size the center point for visibility, not minimalism. If you have to consciously search for the reticle before every shot, it is too small for your setup.
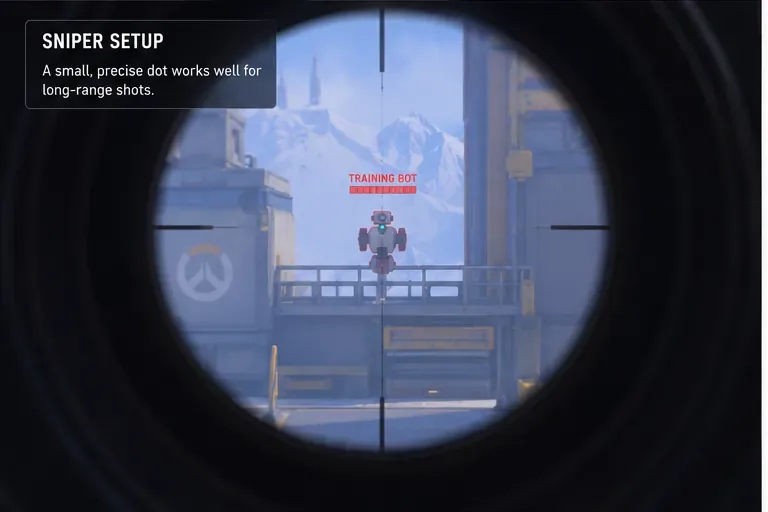
Soldier: 76 asks for sustained tracking more often than Cassidy or Widowmaker. That changes what can feel comfortable. A slightly larger cross gives your peripheral vision more structure while you follow a strafing target, yet it should still leave the center open.
Recommended Soldier: 76 starting point: Crosshairs, Show Accuracy Off, Thickness 1, Length 8, Center Gap 6, Opacity 100%, Outline 60-80%, Dot Off. If you prefer a center dot, add a small one without increasing line thickness.
Common misunderstanding: tracking aim does not require a huge circle around the enemy. Large reticles can encourage you to accept “roughly centered” aim when head-level tracking still benefits from a precise center reference.
Action: track a moving bot for several seconds without firing. If you can keep the center on the bot but lose the reticle against the environment, increase outline opacity or change color before making the entire crosshair larger.
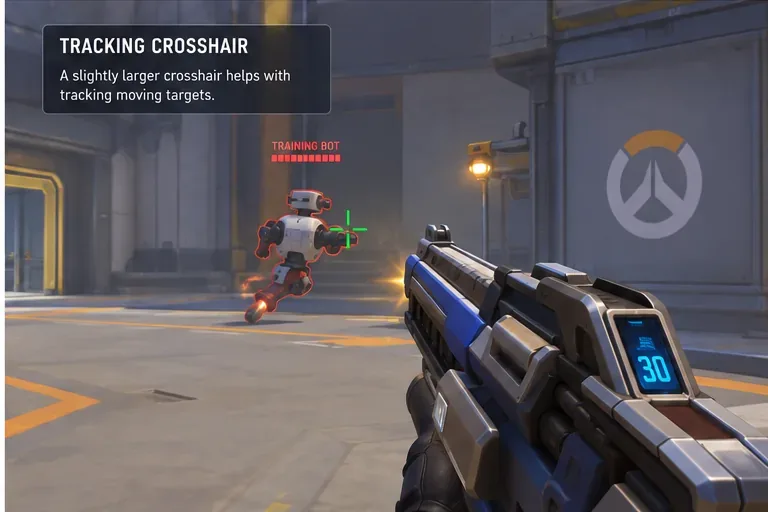
Tracer is technically hitscan, but her dual pistols behave very differently from a single precision shot. Here, Show Accuracy becomes a real preference rather than an automatic Off recommendation. A dynamic reticle can communicate spread behavior, while a static reticle gives you a stable center during rapid tracking.
Verified principle: the reticle display does not change the underlying spread. It only represents information visually.
Recommendation: start with a static crosshair if your priority is keeping your eyes anchored to the target. Turn Show Accuracy On only if you find the spread feedback useful rather than distracting. For very close-range tracking, a slightly larger gap can make the enemy silhouette easier to read.
Action: run one full Quick Play session with static and one with dynamic. Judge target visibility and tracking stability, not how “technical” the reticle looks.
Baptiste benefits from a compact cross similar to Soldier: 76, but his rhythm is burst-based rather than continuous automatic fire. A short cross with a modest gap works well because it supports both fast target switching and head-level burst placement.
Do not make the reticle overly elaborate to distinguish healing from damage. The weapon's behavior and UI already provide other information; the central reticle should remain quick to parse.
Action: if you alternate rapidly between healing and damage, choose the color that remains visible through both friendly and enemy visual effects. Visibility is more important than copying a pro player's exact color.
Sojourn is frequently grouped with hitscan aim discussions because her Railgun shot is effectively instant, but her primary fire uses travel-time projectiles. That means a crosshair optimized only for single-shot flicking may feel less comfortable while leading primary-fire bursts.
Action: use a hybrid layout: compact cross plus a small center dot if you like a hard rail-shot reference. Keep enough line structure to track primary fire without turning the reticle into a large visual block.
Green and cyan are popular because they are easy to separate from many map tones, but no color wins everywhere. Overwatch maps include snow, neon signs, vegetation, orange explosions, blue barriers, and bright skies. Your enemy-outline color and color-blind settings can also change what is easiest to see.
Common misunderstanding: copying a professional player's exact hex-like color choice does not copy their visual system. Their monitor, brightness, outline colors, resolution, and viewing distance may differ from yours.
Action: test the reticle in at least three environments: a bright outdoor map, a dark interior, and a visually busy team fight. Keep the color that stays visible in all three.
Blizzard added Outline Opacity specifically so players could control the black border surrounding custom reticles. This is valuable because it improves contrast without requiring thick crosshair lines.
Recommendation: start around 70%. Increase toward 100% if your reticle disappears against bright backgrounds. Reduce it if the outline makes a one-pixel-style cross feel too bulky.
Action: if your crosshair vanishes against the sky, fix outline or color first. Only increase Thickness if those adjustments are not enough.
For Cassidy, Ashe, Widowmaker, Soldier: 76, and Baptiste, Off is the cleaner baseline because the reticle stays fixed. That makes it easier to build consistent visual memory around one center point.
For spread-heavy hitscan heroes, Show Accuracy can be useful if you actively read the spread state. The downside is movement in the reticle itself, which some players interpret as visual noise.
Action: if the moving reticle pulls your attention away from the enemy, turn it off. If it helps you time shots or understand spread, keep it on. This is a preference with a functional tradeoff, not a universally correct setting.
| Preset | Best for | Suggested values |
|---|---|---|
| Precision Cross | Cassidy, Ashe, Baptiste | Thickness 1, Length 6, Gap 4, Opacity 100, Outline 70, Dot 0 |
| Minimal Dot | Widowmaker, experienced Ashe players | Small visible dot, strong enough outline, minimal or no cross lines |
| Tracking Cross | Soldier: 76, sustained hitscan tracking | Thickness 1, Length 8, Gap 6, Opacity 100, Outline 60-80, Dot 0 |
A minimalist reticle becomes counterproductive when you lose it during fast camera turns, bright effects, or chaotic close fights. If you need a fraction of a second to find the center before shooting, the design is costing you more than it saves.
Action: first raise outline opacity, then change color, then increase length slightly. Make one change at a time so you know what actually improved visibility.
A reticle is too large when the lines or dot routinely cover the head you are trying to place the shot on, especially at medium-to-long range. Large center gaps can also make precise flicks feel vague because the actual aim point becomes visually ambiguous.
Action: reduce thickness before reducing opacity. You want a clear reticle, not a faint bulky one.
For the majority of traditional hitscan play, start with a thin static cross: Thickness 1, Length 6-8, Center Gap 4-6, full opacity, strong outline, and no center dot. Use a slightly tighter version for Cassidy and Ashe, a minimalist center for Widowmaker, and a slightly wider version for Soldier: 76-style tracking.
The most important correction to common crosshair advice is that reticle size does not change your weapon's actual hit registration. Blizzard adjusts hitscan projectile sizes and hero hit volumes independently in balance patches. Your crosshair should therefore solve three visual problems only: Where is screen center? Can I still see the target? Can I reacquire the reticle instantly after movement?
If a setting answers those three questions better for you, it is a good setting even if it does not match a popular pro preset. Start from the baselines above, test in real matches, and make small changes based on a specific problem rather than rebuilding the reticle every time your aim feels off.
Enable PUBG’s network statistics HUD to monitor ping and packet loss in a match. See where to find it, what the numbers mean, and what they cannot diagnose.
Learn how to import VALORANT crosshair codes, compare presets with manual settings and spectator copy, and fix common import issues.
Choose Dota 2 minimap size, hero icons, team colors, and background settings by readability, fewer misclicks, and clear results on your own display.
Fix Fortnite texture pop-in on PC with official steps for GPU drivers, file verification, DirectX 12, high-resolution textures, VRAM, SSDs, and stutter.
Learn what Heroes of the Storm minimap size and position options are verified, improve readability, and choose camera-click controls that suit you.
Set Super Smash Bros. Ultimate Quickplay to prefer hazards-off stages. Follow the Preferred Rules menu steps and learn why matchmaking may not always honor them.
Enable Server Latency and Packet Loss in Warzone to monitor connection quality, read the overlay, and use recurring spikes to guide troubleshooting.
Learn how to carry from mid lane in League of Legends by setting up waves, choosing safe roam windows, reading side lanes, and converting pressure into objectives.
Fix Minecraft Evoker spell problems with a safe vanilla test, version checks, log review, and a step-by-step way to isolate mod or datapack conflicts.
Fix PUBG stuck on Initializing on Steam with a focused checklist for PC service notices, launch options, game files, downloads, and connection issues.