How to Replace a PS5 DualSense Controller Battery
A PS5 controller that no longer holds a charge may need a new internal battery. On the standard DualSense, the battery connects to the motherboard with a small plug, so a typical battery swap does not require soldering. The repair still involves opening the shell, and the exact battery and internal layout depend on the controller revision. Confirm your model and the replacement pack’s fit before you begin.
This PS5 controller battery replacement walkthrough covers the standard DualSense repair approach documented for specific revisions. It does not cover the DualSense Edge. Sony’s current DualSense manual warns against unauthorized disassembly or modification and says unauthorized modification voids the manufacturer’s guarantee; check the warranty terms for your market or use PlayStation Repairs if you want manufacturer-backed service.
Check the controller revision and battery first
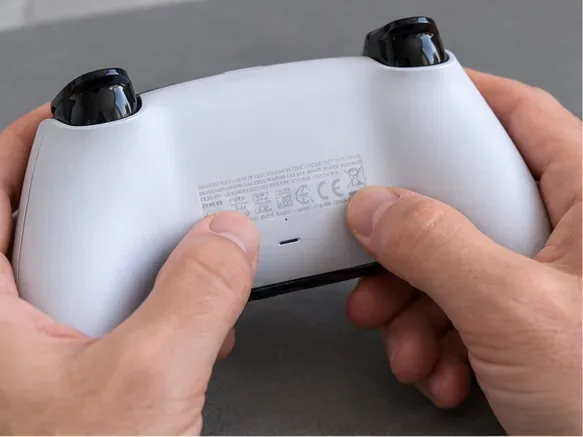
Read the model information on the back of the controller before ordering anything. Sony lists standard DualSense models CFI-ZCT1W and CFI-ZCT2W; the Edge is a different product (CFI-ZCP1). A shared product name does not guarantee that every battery pack or teardown sequence fits every revision. For example, iFixit separates its older V1 and V2 replacement guides, and its listed 1,700 mAh aftermarket battery is specifically described as compatible with V1/V2 models. Sony’s CFI-ZCT2W manual lists a built-in 3.65 V, 1,560 mAh battery. Treat those figures as model-specific, not as a universal DualSense specification.
Match the replacement by exact controller revision, battery part number, voltage, connector shape, and physical dimensions. Do not buy a pack solely because a listing claims a larger capacity or says “for PS5.” If your label does not match the compatibility information, pause and find a guide and part listing for that precise revision.
Tools and safety before you open the controller
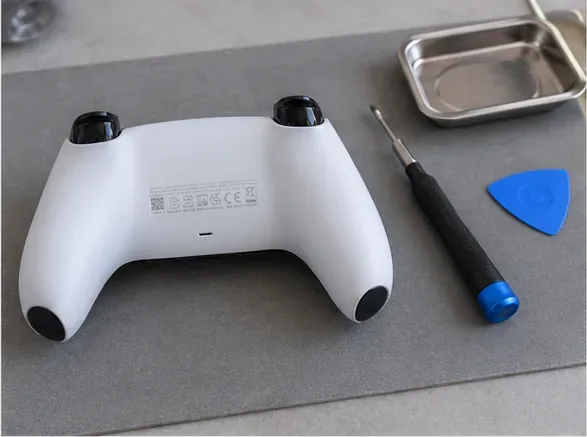
iFixit rates its documented battery repairs as moderate and estimates about 15–30 minutes; a first repair can take longer. Gather:
- Phillips #00 precision screwdriver
- Plastic opening pick and a plastic spudger
- Fine tweezers or steady fingers for the battery plug
- Small tray or magnetic mat for screws
- A compatible replacement battery for your exact revision
You do not need a soldering iron, heat gun, alcohol, or glue for the plug-in battery swap described here. Work on a clean, dry, well-lit surface. Do not bend, puncture, crush, heat, or short the lithium-ion cell. If the battery is swollen, leaking, unusually hot, or physically damaged, stop and arrange professional handling; do not try to pry it out. Take the removed cell to an appropriate battery recycling or e-waste collection point, following local rules.
12 steps for a DualSense battery replacement
The sequence below is a practical overview, not a substitute for a revision-matched teardown. Clip locations and access details can differ. Stop if your controller does not match the guide you selected.
1. Confirm the replacement battery fits
Compare the battery label, voltage, connector, and dimensions with the original part or a trusted compatibility listing for your exact controller revision. Set aside a battery that does not match; never adapt the connector or wiring.
2. Power down and prepare the work area
Turn off the controller, disconnect its USB cable, and make sure it is not paired or powered on. Place it face-down on the mat. Keep the screws and removed buttons in separate spots so they go back to their original locations.
3. Release the lower-right middle-trim clip
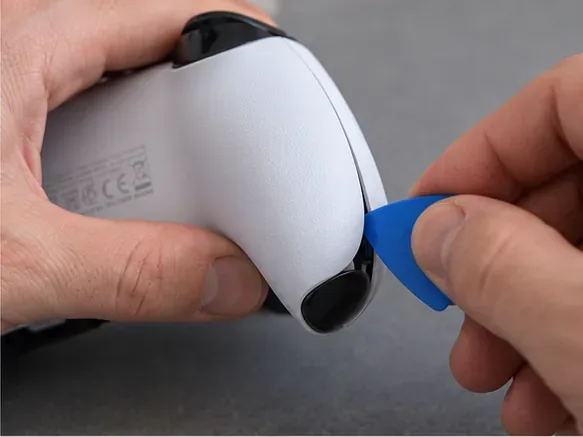
Insert a plastic opening pick shallowly under the middle trim at the lower-right corner. Twist only enough to release a clip. Avoid metal blades, which can gouge the shell or slip into internal parts.
4. Work around the trim and lift it off
Slide the pick along the lower edge to release the nearby clips, repeat on the opposite side, then lift the trim over the analog sticks. If the trim resists, check for an unreleased clip instead of pulling harder.
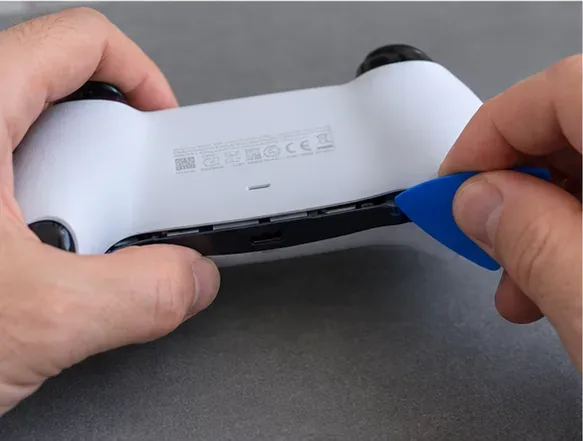
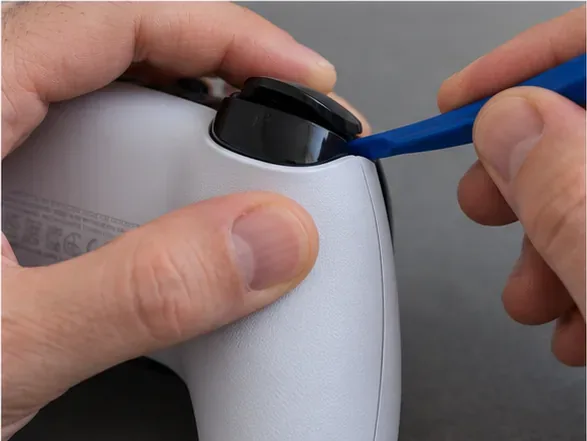
5. Remove the L1 and R1 buttons carefully
On the documented shell layouts, the shoulder buttons must come off to reach the case screws. Use a plastic spudger at the button edge and shield each button with a finger as it releases. Keep the L1 and R1 pieces separate. Do not pull on the trigger mechanisms.
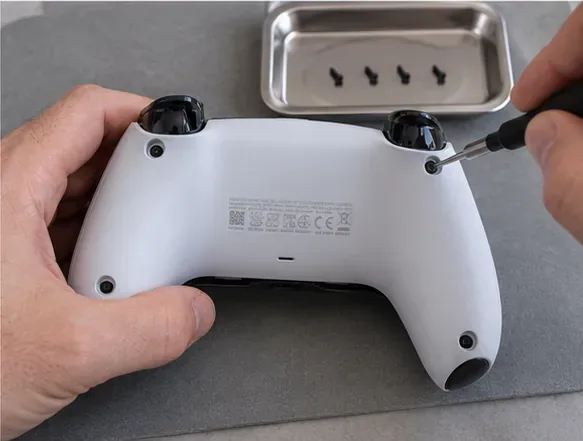
6. Remove the four rear-case screws
Use a Phillips #00 screwdriver to remove the two lower screws and the two screws behind the L1/R1 buttons. Turn the driver straight and apply light downward pressure to avoid stripping the small heads.
7. Release the rear-shell side clips
Use the flat end of a plastic spudger in the seam between the front and rear shells. Work down each side to release the clips. Some revisions have tight clips near the shoulder buttons; use the matching guide for the direction in which they release.
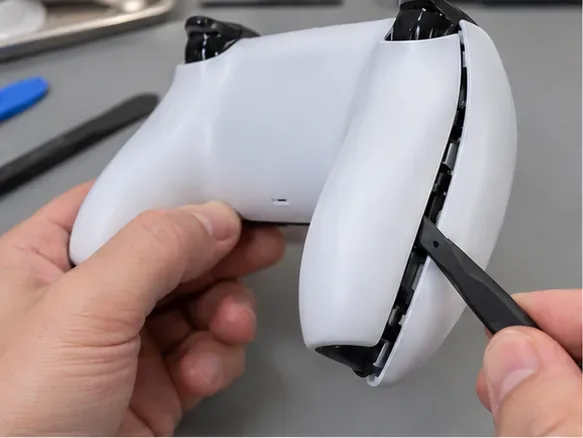
8. Lift off the rear cover
Once the clips are free, support the controller and lift the rear cover away. Do not jerk the halves apart: small wires and components remain inside. Set the cover aside with its inner surface facing up.
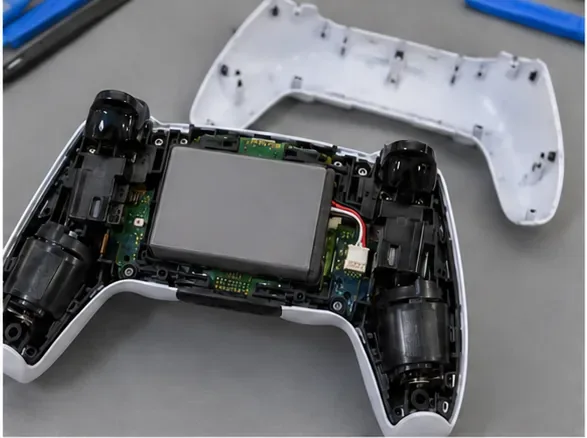
9. Expose the battery connector
Locate the battery in its holder. Depending on the revision, the battery may lift from the bracket to give access to the plug, or the plug should be disconnected before the pack is lifted out. Follow the revision-specific guide for the order. In either case, support the pack and never stretch its short lead.
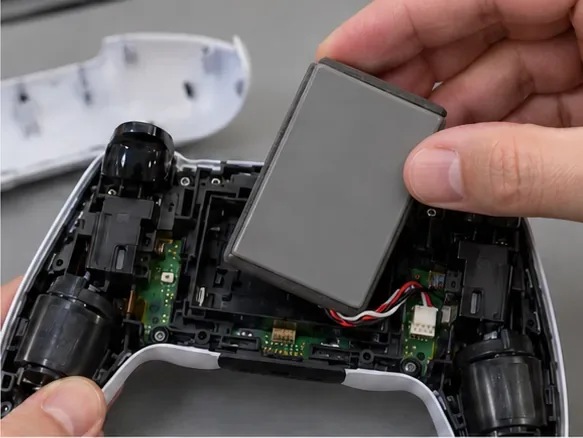
10. Disconnect the battery at its plug
Use your fingers or tweezers to grip the small plastic connector, not the red and black wires. Ease the plug out with gentle, controlled movement. Do not lever hard against the motherboard or pull the wire bundle.
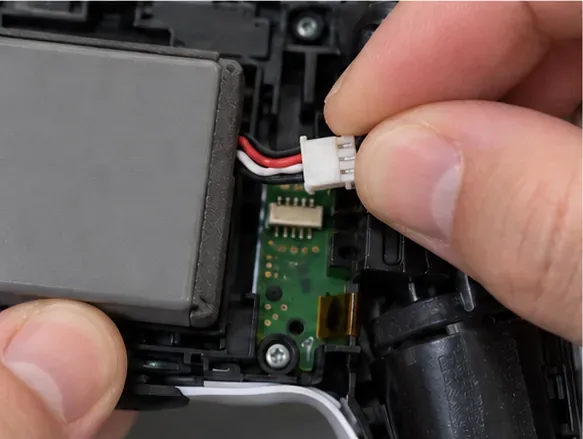
11. Install the compatible replacement pack
Remove the old battery only after it is disconnected. Seat the new pack flat in the holder and connect its plug in the same orientation as the original. The plug should fit without force. Route the cable as it was routed before, away from screw posts and moving parts; do not solder, splice, or force a mismatched connector.
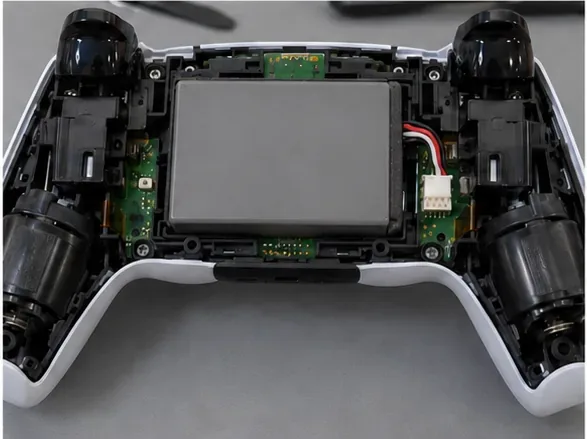
12. Reassemble and test charging
Follow the disassembly steps in reverse. Check that internal wires are not trapped between the shells, align the rear cover, and press around the edges until the clips sit flush. Reinstall the four screws and shoulder buttons, then snap the middle trim back into place. Connect the controller by USB-C and verify that it shows a charging indication, powers on, and responds to buttons, sticks, triggers, and vibration.
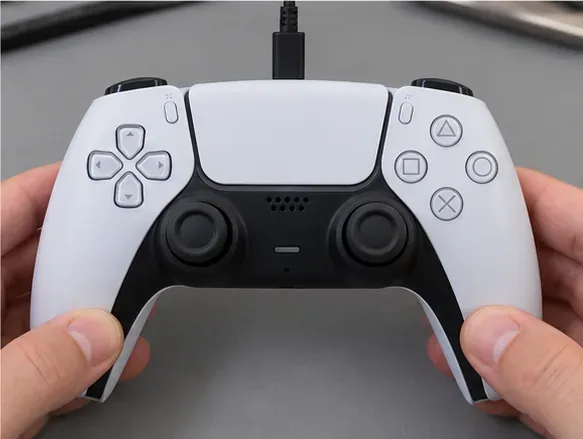
If the controller still will not charge
- Disconnect the cable and reopen only if you can do so safely; check that the battery plug is fully seated and its wires are not pinched.
- Try a known-good USB-C cable and a different USB port before assuming the replacement cell is faulty.
- If the controller powers on but the battery level remains wrong or playtime is still short, verify that the installed pack is the right revision and capacity. Do not keep charging a pack that becomes unusually hot or appears damaged.
- If the connector, board, or battery is damaged, stop and contact PlayStation Repairs or a qualified repair shop. Use official troubleshooting or reset steps only after basic charging checks.
A careful DualSense battery replacement starts with correct part matching, uses the battery’s plug instead of soldered wires, and ends with a basic charge and control test. The most important pro tip is to stop when your controller’s internals do not match the revision-specific guide.
Repair references
- iFixit battery replacement guide for the earlier DualSense revision
- iFixit battery replacement guide for DualSense V2
- iFixit battery replacement guide for DualSense V5
- iFixit replacement battery compatibility and specifications
- Sony DualSense CFI-ZCT2W instruction and safety manual
- PlayStation controller support and repairs