How to Check Real-Time Server Latency in the PUBG HUD
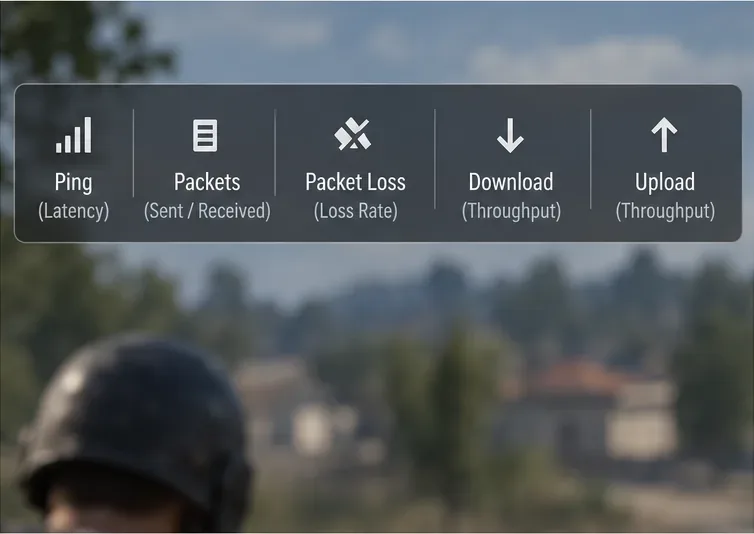
Enable PUBG’s network statistics HUD to monitor ping and packet loss in a match. See where to find it, what the numbers mean, and what they cannot diagnose.
To make a drivable car in Roblox Studio, build a chassis, connect each wheel with correctly aligned HingeConstraints, use a VehicleSeat for player input, and let a server Script turn that input into wheel torque and steering. This setup gives you rotating wheels, working front-wheel steering, and physics collisions without relying on the VehicleSeat to control hinge motors automatically.
The visuals below are Studio-style guides to object placement, not exact screenshots of the current editor. Follow the names, settings, and code in the instructions. This beginner build is rear-wheel drive with a rigid chassis; it does not include suspension or a differential.
The core idea matters: a HingeConstraint joins two Attachments at a shared point and axis. A motor hinge targets angular velocity; a servo hinge targets an angle. Roblox's VehicleSeat documentation also explains that its built-in movement only detects motors connected directly to the seat or through rigid connections. Since the wheels below sit beyond hinges, the controller script reads the seat inputs and updates the hinges itself.
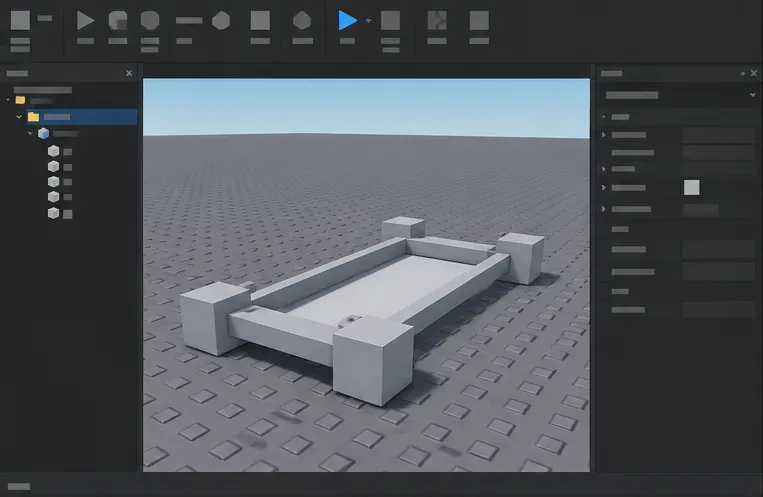
In Workspace, create a Model named Car. Add a Part named Chassis and set its Size to about (6, 1, 10). Place it a little above the Baseplate, centered at roughly (0, 2.3, 0). Set the model's PrimaryPart to Chassis. The exact scale can vary; the dimensions here are starting proportions, not engine limits.
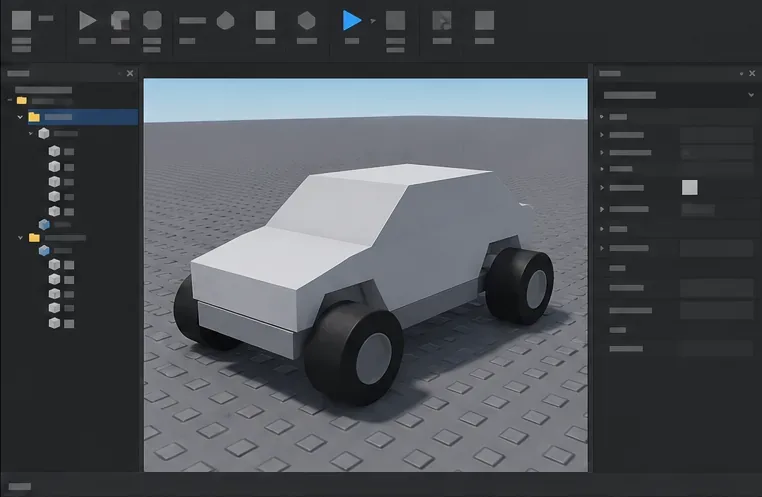
Add simple Parts for the hood, cabin, and rear body. Position them above the chassis, then connect each decorative part to Chassis with a WeldConstraint. Set decorative pieces to CanCollide = false and, if they are only visual, Massless = true. Keep the chassis as the main collidable frame.
Create four cylinder Parts named WheelFL, WheelFR, WheelRL, and WheelRR. Rotate each cylinder onto its side so its axle runs left to right. Place wheel centers at these offsets from the chassis center:
| Wheel | Offset from Chassis | Position |
|---|---|---|
| WheelFL | Front left | (-3.5, -1, -3.2) |
| WheelFR | Front right | (3.5, -1, -3.2) |
| WheelRL | Rear left | (-3.5, -1, 3.2) |
| WheelRR | Rear right | (3.5, -1, 3.2) |
For a 2.6-stud wheel diameter, those offsets put the tire bottoms close to the Baseplate when the chassis center is near Y = 2.3. Set the wheels' CanCollide to true. Do not weld the wheels to the chassis; they need to rotate on their hinges.
Add an Attachment at the center of each wheel and name it AxleAttachment. Add matching axle attachments to the chassis at the wheel centers. The two attachments for any wheel hinge must occupy the same world position and their yellow axis arrows must point in the same direction. For the wheel joints, align that axis horizontally across the car.
For the front wheels, add small hub Parts named HubFL and HubFR at the same centers as the front wheels. Set them transparent, non-collidable, and massless. Each hub needs two attachments: a steering-pivot attachment aligned vertically, and an axle attachment aligned sideways. Use Studio's constraint visualization to confirm the axes before playtesting; a hinge that is twisted or offset will bind or wobble.
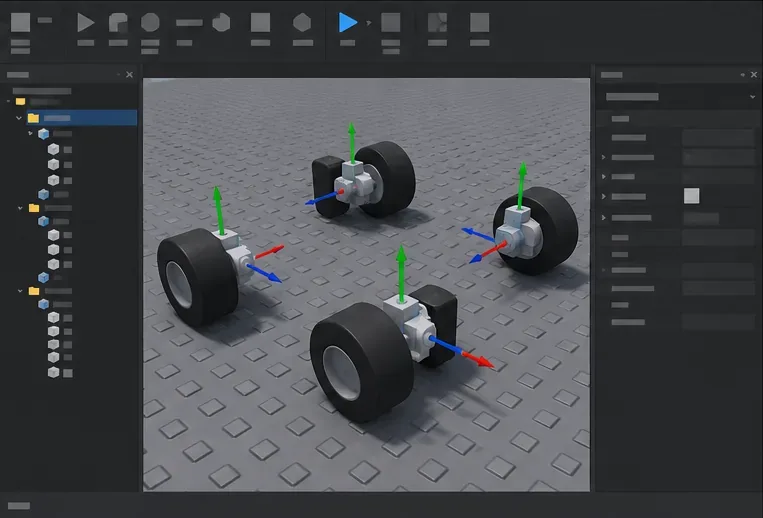
Add two HingeConstraint objects to the Car model: MotorRL and MotorRR. For each one, connect the matching Chassis axle attachment to the rear wheel's AxleAttachment. Set ActuatorType to Motor, and start with MotorMaxTorque = 8000 and MotorMaxAcceleration = 60. The controller will set AngularVelocity while the player drives.
These torque values are tuning starting points for this small sample build. If the tires spin without moving the car, check that the chassis is unanchored, the rear wheels touch the ground, and both hinge attachments are aligned. Do not add a WeldConstraint across a motor hinge.
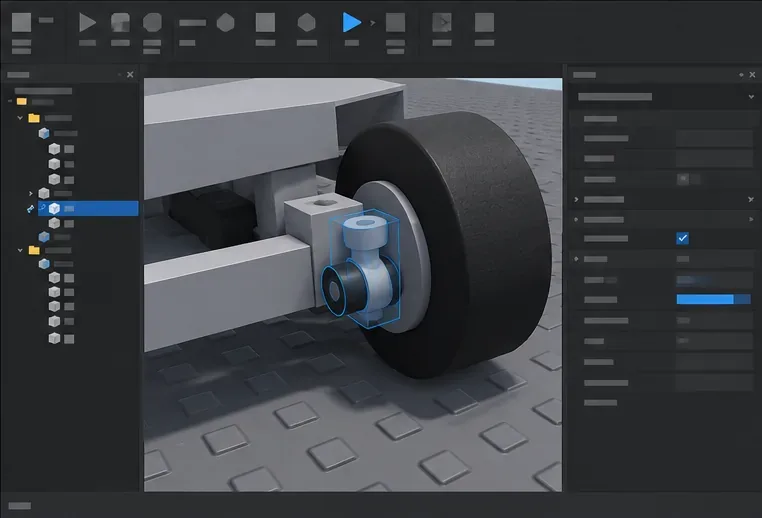
For each front side, connect the chassis to its hub with a steering HingeConstraint named SteerFL or SteerFR. Set its ActuatorType to Servo, enable limits, and set the lower and upper angles to about -25 and 25 degrees. Set ServoMaxTorque to a starting value near 8000.
Then add a second hinge from each hub to its front wheel, named SpinFL and SpinFR. Set ActuatorType to None, so the front wheels can roll freely as the rear wheels push the car. For the steering hinges, both pivot axes must point vertically. The script uses a negative sign for right steering because the model faces -Z; if your wheel pivots turn the wrong way, reverse that sign.
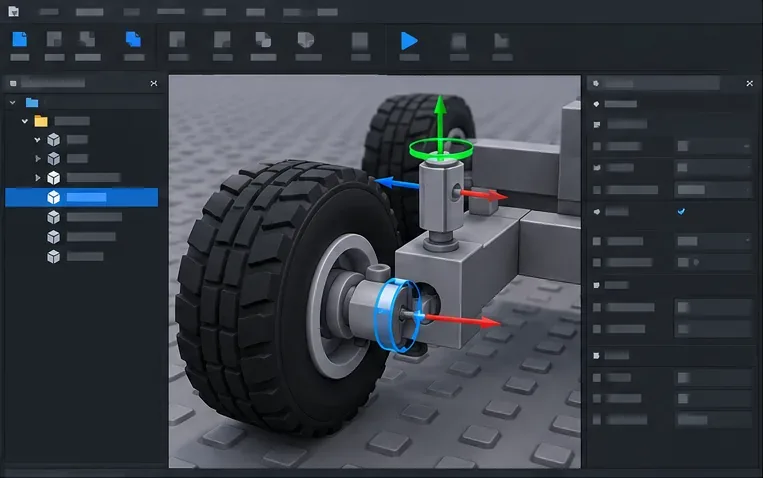
Insert a VehicleSeat into the Car model and place it above the chassis where the driver should sit. Connect it rigidly to Chassis with a WeldConstraint. The seat supplies the player's throttle and steering input; the custom script below passes those values to the hinge motors and servos.
While arranging parts, keep them anchored if that helps you position them. Before running the car, set Anchored = false on Chassis, the seat, body parts, hubs, and wheels. Make sure every moving part and constraint is parented within the Car model. Use VehicleSeat as the exact seat name.
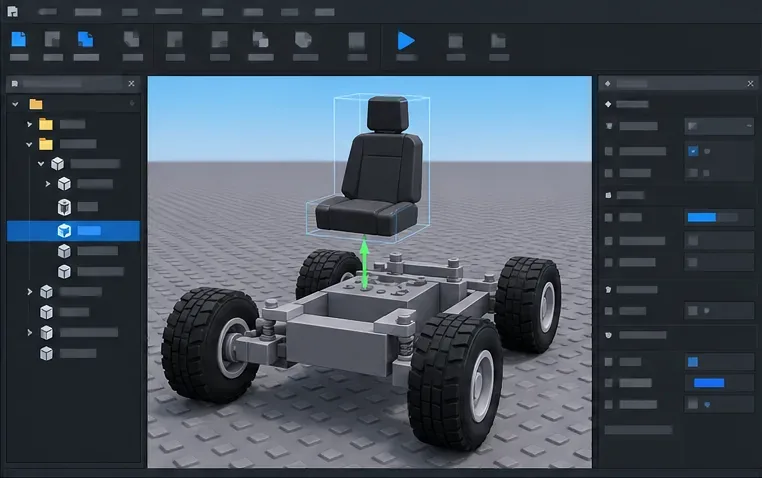
Insert a regular Script into the Car model, name it CarController, and paste this code. It reads ThrottleFloat and SteerFloat from the seat, drives the two rear motor hinges, and aims the front steering servos. Keep this as a server Script, not a LocalScript, so the vehicle logic is not only running on the driver's client.
local RunService = game:GetService("RunService")

local car = script.Parent
local seat = car:WaitForChild("VehicleSeat")

local driveMotors = {
    car:WaitForChild("MotorRL"),
    car:WaitForChild("MotorRR"),
}

local steeringServos = {
    car:WaitForChild("SteerFL"),
    car:WaitForChild("SteerFR"),
}

local MAX_WHEEL_ANGULAR_SPEED = 28 -- radians per second
local MAX_STEERING_ANGLE = 25 -- degrees

RunService.Heartbeat:Connect(function()
    local occupied = seat.Occupant ~= nil
    local throttle = occupied and seat.ThrottleFloat or 0
    local steer = occupied and seat.SteerFloat or 0

    for _, hinge in ipairs(driveMotors) do
        hinge.AngularVelocity = throttle * MAX_WHEEL_ANGULAR_SPEED
    end

    for _, hinge in ipairs(steeringServos) do
        -- The car faces -Z; reverse this sign if your axes turn the other way.
        hinge.TargetAngle = -steer * MAX_STEERING_ANGLE
    end
end)
Make sure the four hinge names in the Explorer match the names in the script exactly. The motor hinges must be set to Motor and the steering hinges to Servo in Properties. For multiplayer responsiveness, Roblox assigns physics network ownership automatically by default. You can assign ownership to the driver for a vehicle assembly if needed, but client-owned physics can be manipulated; validate any vehicle movement that affects competitive outcomes or rewards.
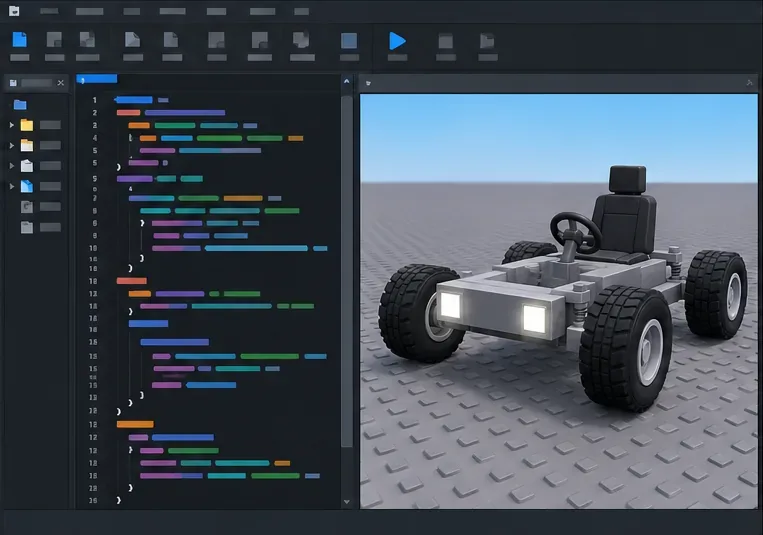
Start a Play test, sit in the seat, and use the normal movement controls. On desktop, the default vehicle input is typically W/S for forward and reverse and A/D for steering, subject to your experience's control settings. Observe wheel spin, direction, turning, and collisions on a large flat test area. Change one setting at a time:
steer in the script.Once the base vehicle works, add headlight and tail-light Parts, a Sound object for an engine loop, or a ParticleEmitter for exhaust. A true suspension upgrade needs spring or suspension constraints and more tuning; this starter Roblox Studio car focuses on a stable chassis, rotating wheels, and responsive steering.
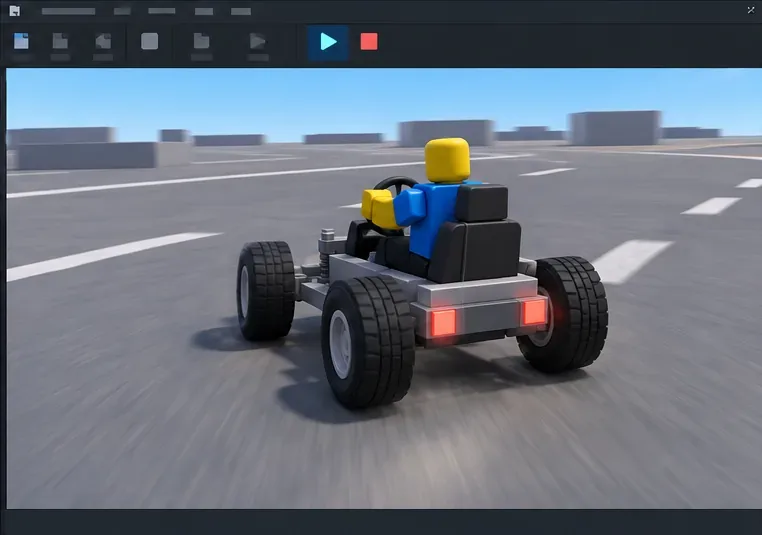
The old approach of welding each wheel to the chassis prevents the wheel from rotating, and a VehicleSeat alone does not guarantee control of hinge-connected wheels. This design separates the jobs: WeldConstraints hold the visual body and seat rigidly in place, HingeConstraints provide rotation and steering, and a server Script maps player input to those actuators. Start with the geometry and settings here, then tune the motor torque and steering angle to match your car's mass and scale.
Enable PUBG’s network statistics HUD to monitor ping and packet loss in a match. See where to find it, what the numbers mean, and what they cannot diagnose.
Learn how to import VALORANT crosshair codes, compare presets with manual settings and spectator copy, and fix common import issues.
Choose Dota 2 minimap size, hero icons, team colors, and background settings by readability, fewer misclicks, and clear results on your own display.
Fix Fortnite texture pop-in on PC with official steps for GPU drivers, file verification, DirectX 12, high-resolution textures, VRAM, SSDs, and stutter.
Learn what Heroes of the Storm minimap size and position options are verified, improve readability, and choose camera-click controls that suit you.
Set Super Smash Bros. Ultimate Quickplay to prefer hazards-off stages. Follow the Preferred Rules menu steps and learn why matchmaking may not always honor them.
Enable Server Latency and Packet Loss in Warzone to monitor connection quality, read the overlay, and use recurring spikes to guide troubleshooting.
Learn how to carry from mid lane in League of Legends by setting up waves, choosing safe roam windows, reading side lanes, and converting pressure into objectives.
Fix Minecraft Evoker spell problems with a safe vanilla test, version checks, log review, and a step-by-step way to isolate mod or datapack conflicts.
Fix PUBG stuck on Initializing on Steam with a focused checklist for PC service notices, launch options, game files, downloads, and connection issues.