If a custom Minecraft block appears twisted, offset, or incorrectly textured, start by checking the resource pack model and the game version. “Minecraft modeling tessellating error” or “shape shifts” is not a documented vanilla error name I could verify in Mojang’s current release notes; it is better treated as a description of a rendering symptom. In Java Edition 26.3, released September 15, 2026, the resource pack version is 97.1, so a pack built for an older release may need version-specific changes. The reliable fix is to isolate the pack, inspect the model JSON and texture references, then test the exported model in the exact game setup you use.
This guide focuses on Minecraft Java block model errors, resource packs, Blockbench exports, and modded rendering. Bedrock add-on geometry uses a different model format, so do not apply Java JSON instructions to a Bedrock model.
What “shape shifts” can mean
A block model defines a parent, textures, cuboid elements, and faces; the model’s from and to coordinates define each cuboid, while face UV values map the texture onto it. A wrong resource location, unexpected element rotation, stale model export, incorrect UV mapping, or another resource pack overriding the same asset can produce a result that looks like a geometry glitch. A missing texture usually points to a reference or file-path problem, while a block that changes only with shaders or mods calls for a renderer compatibility check.
What you see
Check first
The block is shifted, stretched, or rotated
Element coordinates, rotation and origin, blockstate mapping, and the exported model format
A face is missing or appears from only one side
That face’s model entry and any culling setting; compare the face in the model editor
The shape is right but the texture is smeared or missing
Texture identifier, PNG location, face UV coordinates, and pack priority
The issue appears only in a modded profile
Shader and renderer mods, loader version, and compatibility with the exact Minecraft release
Five steps to fix a Minecraft block model error
1. Match the model to your edition and game version
Write down the edition and version shown by the launcher before editing anything. Mojang’s Java 26.3 release notes list resource pack version 97.1. Check the pack’s pack.mcmeta and the release notes for the version you actually run; do not copy a version number from an unrelated pack or snapshot. Model and resource formats can change between releases. Mojang’s 26.1 notes, for example, describe changes to block-model texture render passes, so an older pack may not look identical after an update.
If you are using Bedrock Edition, use a Bedrock geometry workflow and the matching Blockbench export format. Blockbench documents Java Block/Item and Bedrock model formats separately; exporting one as the other can leave you troubleshooting the wrong file.
2. Isolate the resource pack from other changes
Make a copy of the pack or the affected model file first. In a temporary Java profile or test world, turn off shaders and disable other non-default resource packs, then load only the pack containing the model. If the block looks correct without the pack, the game renderer is probably not the first place to look. Enable the affected pack on its own, then restore other packs and rendering mods one at a time. This reveals an override or compatibility conflict without changing your main world.
If the model is wrong in a clean profile too, focus on its JSON, blockstate reference, and texture files. If it changes only after enabling a shader or renderer mod, check that mod’s compatibility notes for your exact Minecraft and loader versions. Avoid installing a random add-on or changing several versions at once; that makes the cause harder to identify.
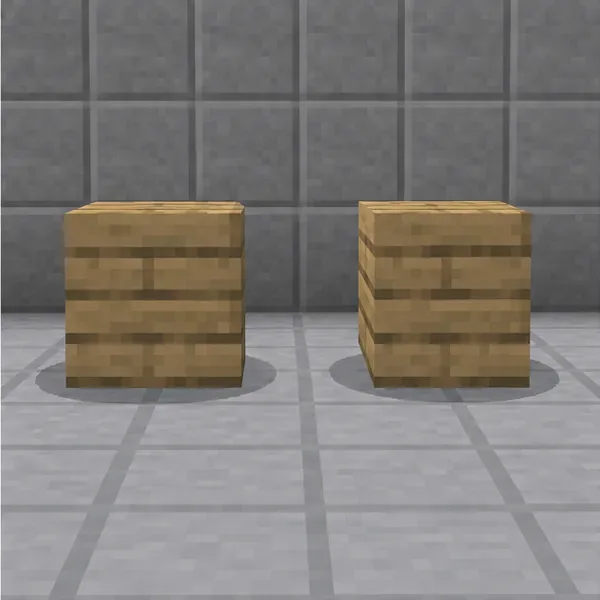
Compare the same test block from more than one angle so a misplaced element or face is easier to spot.
3. Check the model path, JSON, and texture identifier
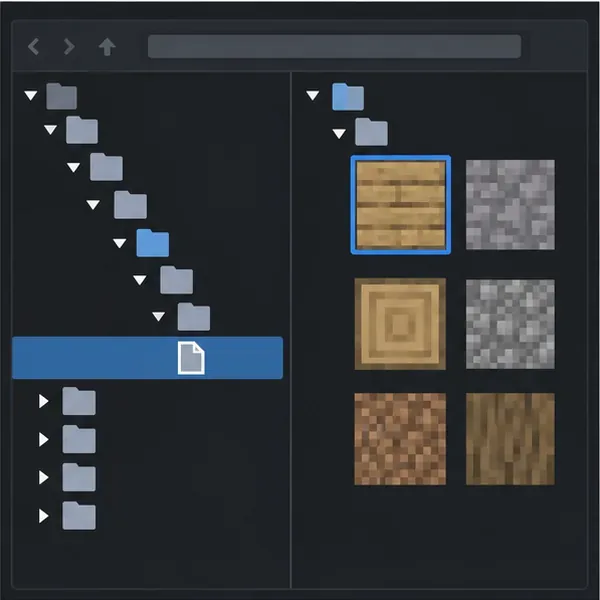
For a Java resource pack, a block model commonly sits under assets/<namespace>/models/block/, its texture under assets/<namespace>/textures/block/, and a blockstate definition under assets/<namespace>/blockstates/. The pack’s pack.mcmeta belongs at the pack root. Check spelling and letter case carefully, and confirm that the blockstate points to the model file you intended.
A simple model that uses one texture can look like this:
That texture identifier corresponds to assets/example/textures/block/custom_crate.png; the identifier leaves out the textures/ folder and the .png suffix. This example is a model definition, not a complete custom-block registration. When replacing an existing vanilla block, also verify the resource location and blockstate path used by that block.
Run the JSON through your editor’s JSON diagnostics or a JSON parser. Fix missing commas, mismatched braces, quote errors, and malformed arrays. A syntax checker cannot tell whether a model ID or texture actually exists, so verify those references against the pack files too. Do not delete a guessed “model cache” folder: it will not repair a misspelled identifier or invalid model file.
Keep the model JSON and its referenced texture in the matching Java resource-pack paths.
4. Inspect the geometry and UV mapping in Blockbench
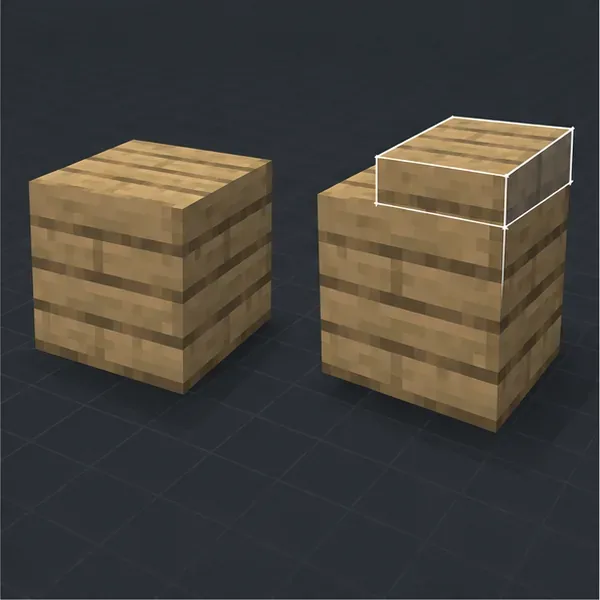
Open the project in Blockbench using the Java Block/Item format and compare the editable project with the exported JSON. Check each element’s from and to values, rotation, and rotation origin. In the common 16-unit block coordinate system, a full cube spans from [0, 0, 0] to [16, 16, 16]; a deliberate slab or overhang will use different coordinates. Look for an unintended offset, a thin accidental cuboid, overlapping faces, or a rotation that was saved around the wrong origin.
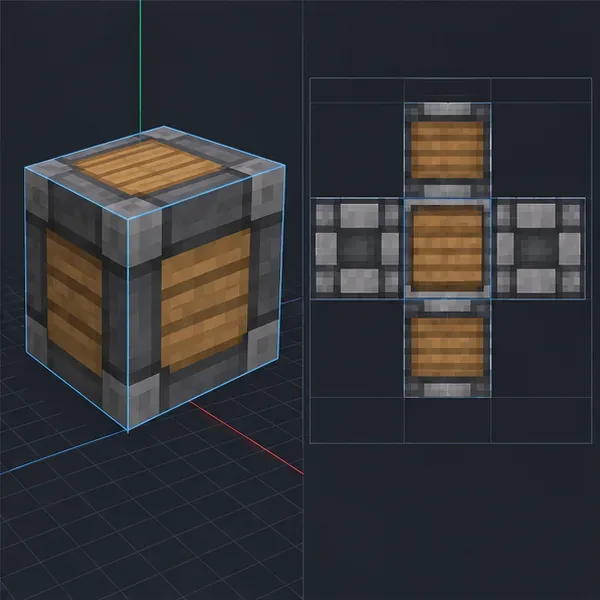
Then select each face and confirm that it points to the intended texture variable and that its UV rectangle covers the intended part of the image. If only the texture is stretched, adjust UVs rather than changing the block’s geometry. If a face disappears from one side, inspect the face definition and culling direction. Culling controls whether a face can be skipped from a particular direction; it does not repair geometry or UV coordinates.
Check how each cuboid face lines up with its UV region before exporting the Java block model.An unintended extra or offset element can make a block look as if its shape has shifted.
Use the Java block-model export, not a Bedrock geometry export or generic 3D format. Keep the editable .bbmodel as a working copy, export to the pack’s intended location, and re-open or preview the exported file to catch changes introduced during export. Blockbench’s format reference and Minecraft style guide explain the format differences and UV mapping workflow.
5. Reload and test in a small, repeatable scene
Reload the resource pack from Minecraft’s Resource Packs screen or restart the game if a modded renderer requires a full restart. In a temporary Creative world, place the affected block and inspect its top, sides, and corners at close range. Compare it with the same block when the pack is disabled. Change one file or setting at a time and repeat the check; otherwise, a successful result will not tell you which change fixed the issue.
If the game logs an error or crashes, open logs/latest.log inside that profile’s game directory and read the lines around the time of the problem. Search for the affected model or texture identifier and note the first relevant exception, rather than relying on a particular warning phrase. Include the Minecraft version, Java or Bedrock edition, loader and version, renderer or shader mods, pack order, and the relevant log excerpt when asking for help. Do not post account credentials or private server details.
Quick diagnosis
Wrong in every profile: check the model JSON, blockstate reference, texture ID, and UV mapping.
Wrong only when one pack is enabled: check that pack’s files and whether another pack overrides the same model or texture.
Wrong only with mods or shaders: isolate those components and verify exact version compatibility.
Wrong after a game update: compare the pack’s declared version and model fields with the official release notes for that target release.
There is no universal “tessellating error” switch to turn off. Treat “shape shifts” as a symptom, identify whether the fault follows the model, texture, pack, game version, or renderer, and fix that specific layer.